Over the past several months, I’ve been seeing more and more of the cooking and baking blogs I follow talking about an online collaboration called The Daring Bakers. I like baking, but I will be the first to admit that I’m not very adventurous when it comes to trying things that look more complicated, so I figured this might be just what I needed. At the end of last month, I finally signed up. The rules are as follows – when you sign up you agree to make the recipe assigned each month. Sometimes there might be parts of the recipe you’re allowed to modify, but there will always be a major portion of it that *must* be done, as written. This month’s challenge – strudel. We could do whatever we wanted for the filling, but no matter what we put inside it, or on top of it, we had to make the dough ourselves.
The dough is pretty straight forward to make – just flour, water, salt, cider vinegar and a little vegetable oil. I mixed it together, kneaded it for a few minutes, and let it sit in a corner of the counter for about 90 minutes (which gave me enough time to run off to the store and buy the walnuts I needed for the filling). Rolling out the dough, however, was a bit more of a challenge. One of the distinctive features of strudel is that it has a series of extra-thin, flaky layers of crust wrapped around the filing. And order to have those layers, the dough had to be rolled out to about the thickness of tissue paper. Literally thin enough to read through.
The recipe recommended using some kind of cloth for the rolling/stretching process, not only to help corral the mess, but also to make rolling it up later a bit less of a hassle. I decided to use one of those thin plastic tablecloths they sell next to party decorations, figuring that it would be large enough to cover my kitchen island, and easy to clean off later. There is really no way to roll the dough as thin as it needs to be, so once you’ve reached the limit with a rolling pin, the next step is to move slowly around the dough and stretch it out with your hands. Because the dough is so thin at this point, tearing is extremely likely. You might notice in the picture below that I obviously need to work on my strudel-stretching techniques a bit more.
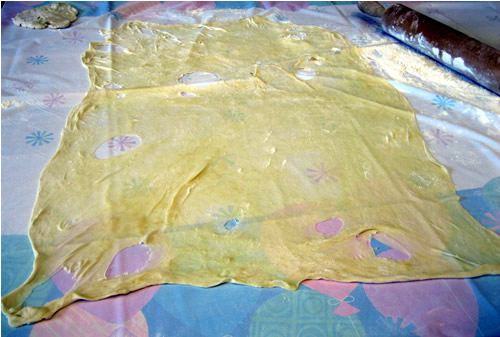
The dough might be full of holes, but I have to say I’m pretty happy with how thin I managed to get it stretched.
The next step is to melt some butter and brush that lightly all over the dough – a task easier said than done, because at this point, the slightest touch was enough to tear the dough even further. On top of that, I sprinkled bread crumbs which I’d previously toasted in a skilled with a little more melted butter. The crumbs are put on the dough to help hold the layers apart while it cook. Once the dough was prepped, I added my filling (a mixture of finely chopped apples, walnuts, cocoa, sugar, and cinnamon), and then used the plastic tablecloth as a guide to very carefully roll the whole thing into a log. I managed to shift it onto a baking sheet with only a minimum of damage (and then did some discrete patching to cover up the worst of the holes), and popped it into the oven to bake.
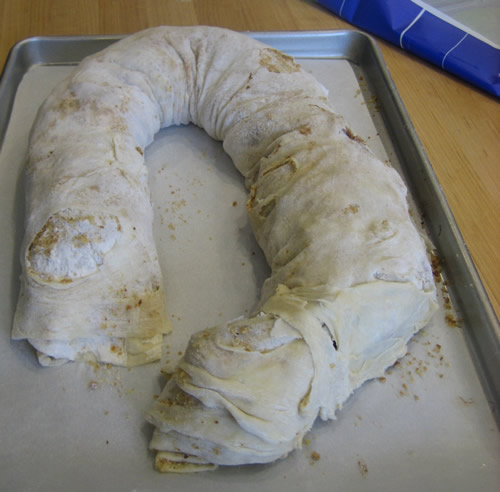
Here it is, prior to being baked, and looking like some sort of disturbing, grub-like creature.
And here it is, straight out of the oven, now looking less grub-like and more like edible pastry.
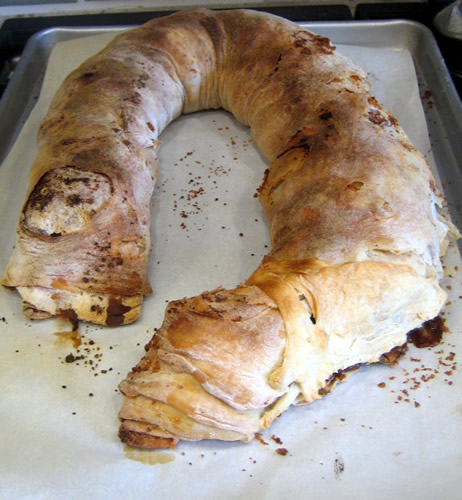
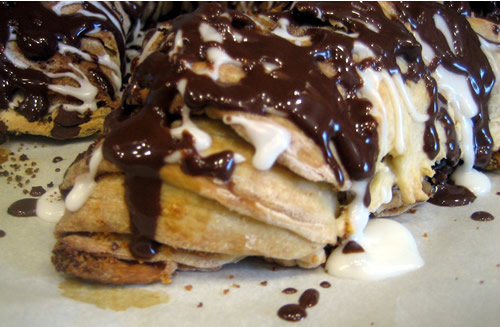
It wasn’t very attractive at that point, and I knew that the addition of the cocoa likely meant it would require a little bit of extra sweetness. So I first drizzled it with a powdered sugar glaze, and then followed that with a chocolate glaze.
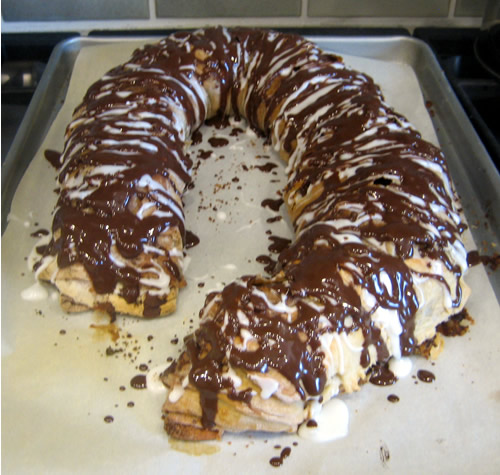
The moment of truth – I sliced off the first two pieces for Richard and myself to try.
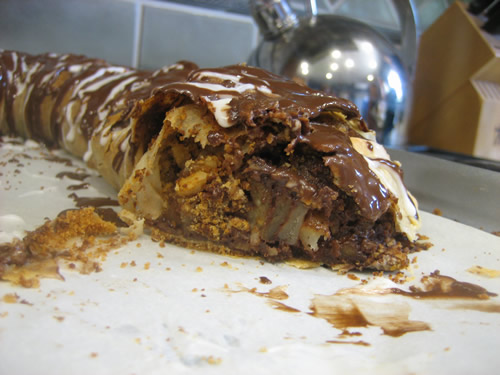
Success! The layers are perfectly light and crispy, with plenty of separation between the top ones; so much so that it was hard to cut the strudel without crispy pieces falling off. And the taste? Absolutely delicious. The apples practically melted during the cooking process (just the way I like them), and the cocoa and the cinnamon gave it a rich taste without being too sweet; in fact, the glaze turned out to be a good thing because without that little drizzle of sugar, it might have been a touch too rich.
I am extremely pleased by how this turned out. The strudel dough was surprisingly easy to make, despite its tendency to tear if you look at it cross-eyed, and it bakes up deliciously light and airy. I could see wrapping it around fillings a bit more savory than sweet (I am currently pondering making a second batch, and this time filling it with a mixture of caramelized onions, potatoes, mushrooms, and some fresh herbs from the garden). While the entire process does take several hours, most of it that is due simply to either letting the dough rest, or else waiting for it to bake / cool, so it could be scheduled around other tasks with a minimum of effort. I’m counting this month’s Daring Bakers Challenge a success.
Strudel Dough is available from the Daring Kitchen recipe archive.
Chocolate Cinnamon Apple Nut Filling
2 lbs baking apples, peeled, cored, and chopped
1/2 cup unsweetened cocoa
1/3 cup + 1 tablespoon sugar
1 teaspoon cinnamon
1/2 cup chopped walnuts
Stir all ingredients together; spread on prepared strudel dough.
White Glaze
3/4 cup powdered sugar
3 to 4 teaspoons milk
Stir together until all sugar is dissolved. Drizzle slowly over top of baked, cooled strudel
Chocolate Glaze
1/4 cup semisweet chocolate chips
1 1/2 teaspoons shortening
Melt chocolate chips in microwave (do short bursts of about 30 seconds at a time; stir after each burst). Stir in shortening and mix until smooth. Drizzle slowly over top of baked, cooled strudel.
The May Daring Bakers’ challenge was hosted by Linda of make life sweeter! and Courtney of Coco Cooks. They chose Apple Strudel from the recipe book Kaffeehaus: Exquisite Desserts from the Classic Cafés of Vienna, Budapest and Prague by Rick Rodgers.
Your strudel looks awesome!! Great job on your first challenge =D.
OMG Very decadent. Looks delicious. Good job. :)
WOW, this looks amazing! I love the idea of chocolate all over the top. YUM! :)
Re. stretching the dough…you could find a good friend with a large-pawed puppy (what am I saying, we’re cat people – okay, a dog is a slobbery/smelly/four-legged creature who’ll do whatever you say if you train it well enough…sort of the opposite of a cat). Anyway, let the puppy warm up with a long run, leap on the kitchen island, slide across, with legs splayed, and the dough will stretch as it slides. Of course, you have to catch the puppy-dough combination before it lands on the floor.
Re. it looking like a grub…ah, you were never seriously thinking about anthropology for a major, were you! It looks like some sort of mummy as uncovered and not yet taken for x-rays.
Re. how it looks/tastes…I wouldn’t know…but I know a couple of parents who’d sure be willing to try it for you…if you ever got a hankering to make one for us!