Still Life, With Cats

This content shows Simple View

Kitchen Adventures

Jars of yum

Today I looked at the calendar and thought, okay, so I know we don’t actually do Valentine’s Day (mutual decision we both are quite happy about), but surely we can use it as a teensy tiny excuse for me to make Tiramisu for Two.

Richard enthusiastically agreed with this plan, so this morning before work I made the sponge, and whipped up the mascarpone and cream filling. Once the sponge was cooled enough, I cut out rings of cake and soaked them in a coffee syrup, and then layered them with the mascarpone cream in two wide-mouth mason jars with sprinkles of cocoa powder between everything. Then I covered them up and popped them in the fridge so the coffee soak would have time to do its thing during the day, and then after dinner, we got to enjoy them.

These were quite delicious, and super easy and quick to make. I really appreciate that lately King Arthur Baking Company has been sharing a lot more recipes scaled down for only a few servings. Plus there’s some cake scraps left, and there’s still lemon curd in the fridge, so I think we’ll getting one more tasty dessert out of this when we’re done.

Making a thing a day for Thingadailies.


Just a quickie

Today is all about breakfast, and surprise, it’s not a baked item!

When you have a bunch of leftover tiny potatoes, and also half a bag of celery in the fridge that needs using up, plus one lonely onion, then it’s time to chop everything up (along with a sweet potato) and turn it all into a big pan of hash.

You need to time everything so your veggies all end up cooked to you preferred level (oops, my sweet potato chunks got a little mushy), but then when it’s done, you dump a big scoop onto a plate and top that with a well-cooked sunny side up egg, and poof, you’ve got a lovely filling breakfast, plus leftovers for the next couple days.

Next time I’ll maybe swap in carrots instead of the sweet potato, as that’s less likely to go mushy with overcooking, but otherwise this is pretty tasty, and at least the next couple days’ worth of breakfast is sorted.

Making a thing a day for Thingadailies.


Savory and sweet

Today counts as a double because it was a Baking Sisters day, and since we’re still working our way through the states, this month we decided to tackle Montana and Nebraska.

I should note, for the record, that most states don’t actually have any sort of ‘official’ food (although some certainly do), so we have to rely on the internet to give us ideas, on either something the state is known for (producing) or something that’s most often found in restaurants in that area. So for Montana, we picked Butte Pasties, and for Nebraska we picked popcorn balls, because apparently Nebraska is a huge producer of popcorn.

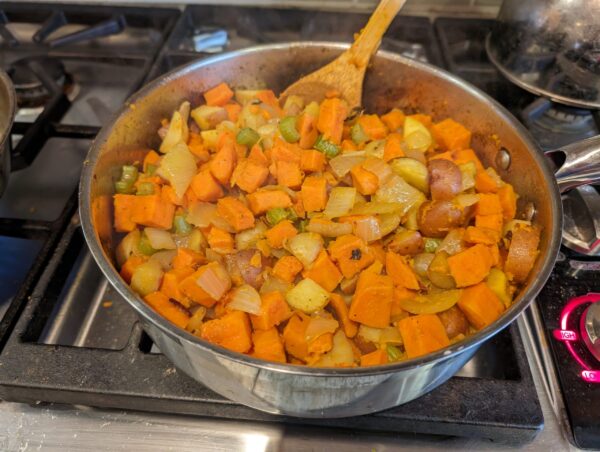
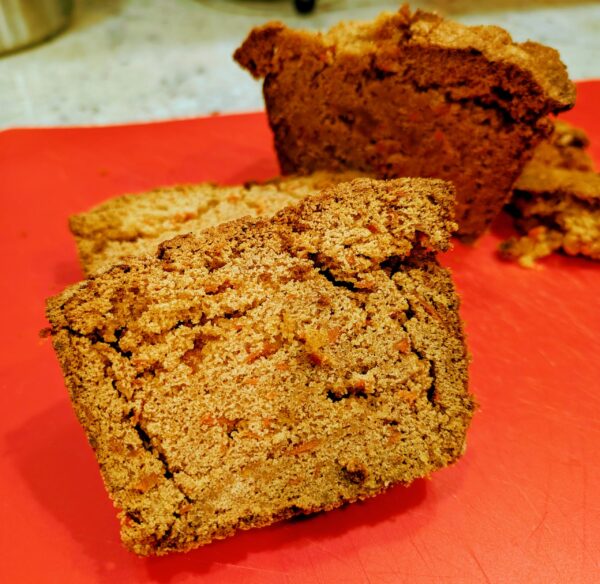
Pasties are one of those foods that’s been around forever, in various forms. Let’s face it, basically every culture eventually develops a food that can be carried around and eaten without the need for a plate or silverware, and the outer casing is usually some kind of pastry dough. In this case, it’s a basic butter-based pastry dough (there are other versions that use lard, but as we’ve determined in previous challenges, my sister and I prefer to avoid that when possible). We made the dough and then, even though the recipe didn’t call for it, popped it into the fridge to chill while we made the filling. I chose to make the traditional filling, which is cubed beef, onions, and potatoes.

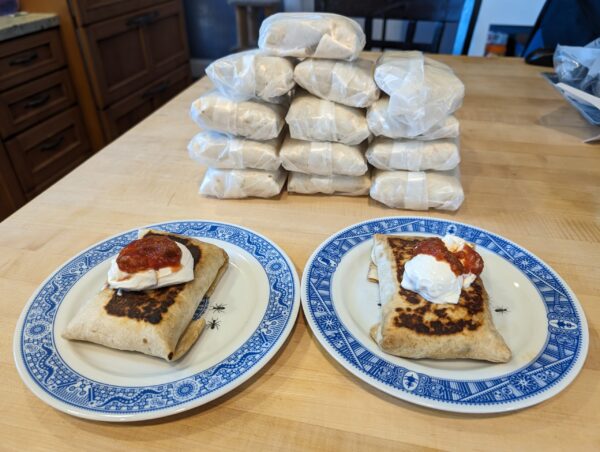
Once you have a huge bowl of filling, then you divide the dough into 4 pieces, and roll each piece out into a round the size of the dinner plate (yes, really). Divide the filling between the four ginormous dough circles, then fold the dough in half over the filling, and seal the edges with a little bit of whisked egg. The tops are given a quick egg wash, and then they go into the oven and bake for roughly an hour, which seems like an inordinately long time to bake anything involving pastry dough, but which is necessary for all the raw meat and veggies to actually cook through.

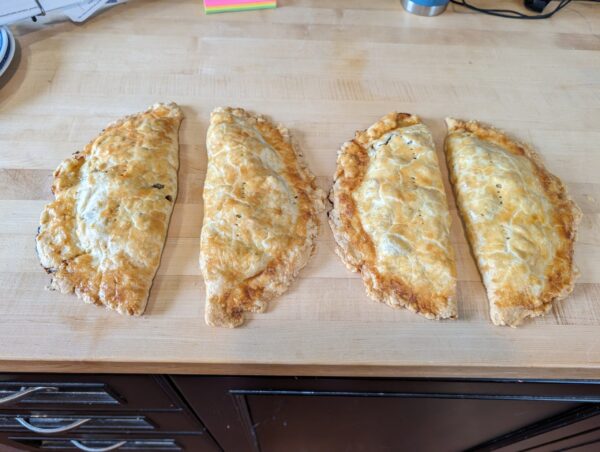
It’s hard to get a sense of size from these, I know, but Richard and I split one between us and it was plenty for an extremely filling lunch. The rest will go into the freezer for future lunches.

These were fairly easy to throw together, and I could easily see doing similar pasties (maybe without the potato but perhaps some additional veggies – carrot, double the onion, a little chopped celery, leeks) and even ground meat instead of the cubed stew meat to save some time in the prep work. Delicious.

And now on to Nebraska. My sister and I decided to make Peanut Butter Popcorn Balls, because why not. And here’s where it gets amusing.

Today happens to also be a Big Day if you care about Sports Ball. So Richard went to the store first thing this morning like he usually does the morning of our Baking Sisters sessions, except that we very belatedly realized that the stores would be packed due to everyone getting ready for the big Sports Ball Event. Oops. Anyway. The point of this little sidebar is that the only popcorn he could find was little bags of microwave popcorn. Okay. So those should still be fine, right?

Ha. No. The package said the bag should only take about 1 to 1 1/2 minute to pop. After zapping it for probably closer to 8 minutes, I still didn’t have more than half the kernels popped. In fact, despite the fact that the package said each bag should have produced over 5 cups of popped corn (and I only needed 5 cups), I ended up having to microwave three separate bags, in order to get enough popped corn to use for the recipe. And on the other side of the videocamera, my sister was having very similar problems with her plain popcorn she was trying to pop in a pan on the stove. We both found it pretty amusing that the most difficult part of today’s baking adventure was popping corn. Thanks Nebraska!

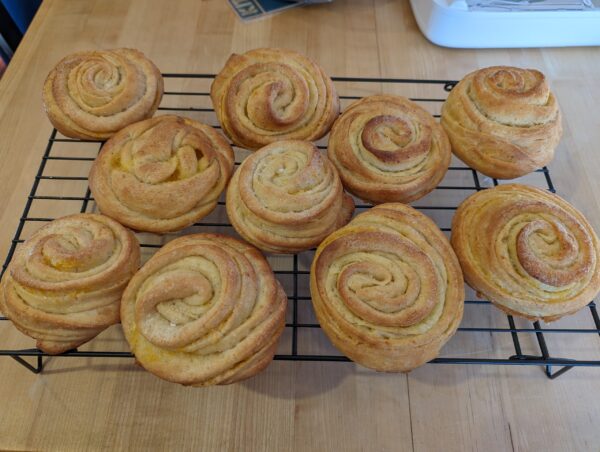
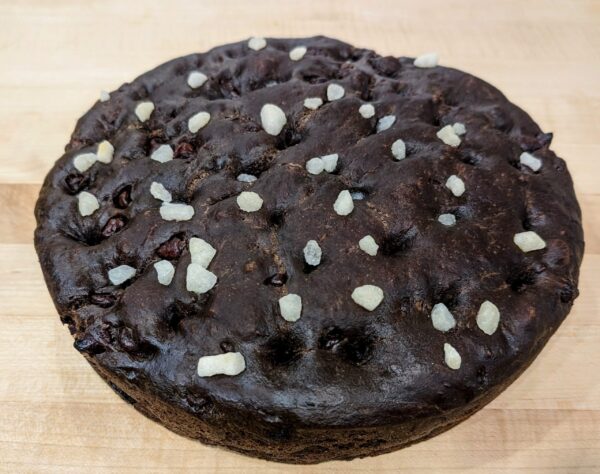
But anyway. Corn finally popped, you then make a caramel out of corn syrup and sugar, and once that’s done, you stir in peanut butter and a little vanilla, and then you very quickly mix that into the popcorn until it’s well coated. Let it sit for just long enough so you can work with it, and then it gets formed into balls.

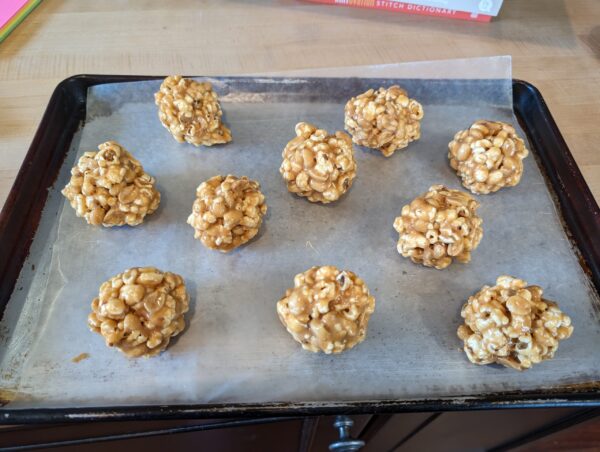
These are definitely snack sized little confections (each one has only about half a cup of popcorn in them), but they turned out quite tasty. My caramel was the perfect consistency so the balls hold their shape without it being too brittle. The peanut butter flavor comes through, but also the caramel, and the whole thing is a chewy, delicious treat. Nebraska, you are forgiven!

Making a thing a day for Thingadailies.


All wound up

When one has made a large batch of lemon curd, one immediately ponders ways to use it up. Which is why this morning I made Meyer Lemon Morning Buns (I would link the recipe, but the URL appears to no longer be functional, so…hmm).

You start with a fairly basic enriched yeast dough, and after that’s risen for about an hour, then you carefully flatten it out into a rectangle. You slather the rectangle with some lemon curd, then fold over one side and sprinkle the whole thing with a mix of lemon zest and sugar to add a little more lemon flavor. Then you fold over the other side, pinch the edges closed, turn, and carefully flatten back into a rectangle so you can cut it into thin strips, about 1 inch wide. Those then get twisted and spiraled, and then carefully placed onto baking sheets. Another (shorter) rise, and you brush them with melted butter and then pop them into the oven to bake. And when they’re done, ta da, you have a bunch of lovely swirly buns!

The lemon flavor in these is fairly light (Adding some lemon zest to the dough itself would probably help a lot here), but otherwise we really liked them. One bun makes a delicious breakfast, so these will last us for a couple days, and the shrub in the backyard has a bazillion more lemons, so I’ll definitely be making these again.

Making a thing a day for Thingadailies.


Wrap

Today we veered wildly off the soup and baked goods track and instead made a big pile of bean and cheese wraps.

This is a recipe we’ve made many times in the past, and it’s always one where I put it off and put it off and then finally make a batch and ask myself why I don’t make these more often, because they really are just that easy.

These things are super easy to customize. You start with 6 cans of whatever beans you like (we use black, white, or pinto) rinsed well and then drained. Add in a can of corn (or some frozen corn if you prefer), and a cup of whatever type of salsa you prefer. A chopped onion is a good addition, although since neither of us is a fan of raw onion, I always cook it first. You could also toss in some diced peppers, or whatever other veggies you prefer. A couple teaspoons of a mix of your favorite relevant spices (cumin, oregano, salt, pepper, chili powder, etc.; you decide what level of spice you want), and finally 2 cups of shredded cheddar cheese (you can forgo the cheese but I’d recommend something in a similar vein as a replacement to add both binder and a little moisture to the interior) and you have a ginormous bowl of filling. Then you lay out burrito sized flour tortillas over every open surface in your kitchen, and dole out heaping cups of filling onto each until you’ve used it all up. Fold them so the filling is trapped inside, then wrap them in waxed paper and stash them in the freezer.

To serve, I recommend heating it in the microwave so the filling inside is warm, then giving both sides a quick toast on a pan on the stovetop, so they get some color and crunch. Then top with a dollop of sour cream, salsa, guacamole, or whatever else your little heart desires.

We make ours deliberately a little bland because 1) we have different levels of preferred spice, and 2) we’d both rather spice it up afterwards with extra salsa, but you do you. The point is that with a very small amount of effort, you end up with a dozen or so perfectly filling, fairly inexpensive lunch (or dinner) items in your freezer for when you’re just not in the mood for another sandwich.

Making a thing a day for Thingidailies


Sunlight in a jar

It is that time of year, where the Meyer lemon shrub in the backyard tries to take over the world, and I do my best to call its bluff. And what better way to clear out half a dozen lemons than a double batch of lemon curd?

Curd is one of those things that is easy to make, as long as you are paying attention, because you’re dealing with eggs and if you wander off and leave it alone, you get lemon-flavored egg scramble. It needs to be cooked low and slow, and you need to stir it constantly the entire time (it’s a lot like gravy in that regard). But if you are patient and follow the steps, you end up with a lovely thing at the end.

This is the same recipe I have used ever since I first made curd, back when we moved into this house in 2007. It’s half a cup of lemon juice, 2 eggs, zest from a couple lemons (it usually takes about 3 lemons), 3/4 cup sugar, and 1/2 cup butter, cut into chunks. You whisk everything but the butter together in a metal bowl until it’s blended, then put the bowl on top of a pot of simmering water, add in the butter, and start whisking non-stop. Eventually, if you did it right, the mixture should start to thicken, and start to turn a lovely bright yellow. That’s when you pull it off the heat, and then run it through a fine sieve, because no matter what you did, there’s probably some tiny bits of cooked egg lurking in there, plus that will also filter out some of the zest, which is no longer needed.

I’ve tried actually canning lemon curd in the past (following approved recipes) but it doesn’t turn out as nice after the hot water processing, so instead I just freeze mine in batches, so that throughout the year, I can pull out out whenever I need it.

Making a thing a day for Thingadailies.


File under Nope

We ate the last of the Granola Bread the other day, so I thought it might be nice to branch out and try something new. Inspired by the fact that I had some carrots in the fridge that were starting to look a little sad, I decided to make this Carrot Bread, because not only does it include a whole pile of carrots, it sounded like it would be tasty.

It’s basically a sweet quick bread that includes 9 ounces of carrots, and a teaspoon of cinnamon. How could this go wrong?

Ha.

First of all, this thing weighed a ton, and because I was in a hurry I used only one hand to pull it out and so I consequently dropped it on the floor. Thankfully it maintained enough structure I was able to get it back into the pan and once it cooled it was (mostly) fine.

But that’s not the bread’s fault. No, the issue I had with the bread was that it was alternately both unpleasantly heavy and also too sweet. That 1 teaspoon of cinnamon was not remotely enough to give it any flavor, and the tiny chunk I had left an unpleasant greasiness on my tongue.

Richard actually liked it, so he gets the remaining loaf to snack on for however long it lasts. But the recipe itself is being relegated to the recycling bin, and next time I have too many carrots, I’ll find something else to do with them (like maybe soup!).

Making a thing a day for Thingadailies.


A spoonful of comfort

After a brief reprieve, it’s time for more soup! I know, but this finally gets us caught up to our ‘one per week’ challenge, so yay.

Anyway. Last night I looked in the fridge and freezer to see what needed using up, and then I pulled out a recipe from my stack of Soups To Try that would take care of most of the leftovers: Creamy Ham and Potato Soup.

This soup goes together pretty quickly. First you chop up onion, carrots, and celery, then cook those in butter until soft. Add in the garlic, then make a roux with some butter, and deglaze the pan with some wine (we used some kind of cheap stuff Richard bought specifically for cooking because neither of us drinks wine). Next you add in some broth, then dump in chopped ham, diced potatoes, and a bay leaf. That all simmers until the potatoes are soft, then you stir in some half and half (we used the leftover coconut milk from the Curried Cauliflower soup we made earlier).

We ate it with a small slice of leftover Chocolate Focaccia on the side.

Verdict: Delicious! Quick to throw together and has that ‘comfort food’ appeal you want when it’s cold outside. Not entirely sure what the wine added – you could easily use broth to deglaze instead, and next time we probably will.

Note: The recipe says it makes 4 servings, but we divided it into six bowls and stashed the other four in the fridge for lunches for the next couple days.

Making a thing a day for Thingadailies.


A pound lightweight

Today was kind of exciting. California was hit by a rather nasty storm, with winds gusting upwards of 60 mph in our area, and even higher down in Southern California. We had friends over for an impromptu game day, and halfway through, the power went out. Thankfully it was still light out, so we moved toward the window-side of the table and were able to continue our gaming, but it did mean my plan for (yes, another) soup for dinner was thwarted.

Luckily, however, I had made cake. Or rather, Sandtorte.

A little backstory on what that is and why I picked it. For Christmas this past December, my little sister, my niece, and I all got a copy of B. Dylan Hollis’s cookbook: Baking Yesteryear. If you haven’t stumbled across his baking videos, by the way, I highly recommend you check them out. He’s got a quirky sense of humor and some of the recipes he’s made are absolutely delicious (and of course, some, not so much).

Anyway. Since we all got a copy we decided we’d jointly make one recipe from the book every month, then report back to each other on how it turned out (Why yes, I do do a lot of food-related personal challenges, why do you ask?) In January, we picked the Grasshopper Pie, which I thought was pretty tasty, probably because I used nonalcoholic syrups for the flavoring instead of the Creme de Menthe and Creme de Cacao that the recipe called for, while my sister and niece used the real thing and apparently were not fans (hooray for my accidental better choice!).

This month we picked the Sandtorte, which is from the 1900’s. It’s kind of a pound cake sort of cake, except that you use half flour, half cornstarch, and you whip the egg whites (of the SIX eggs) separately before folding them into the batter, so that at the end you end up with a surprisingly light cake.

The recipe said to place a doily on the top and then sprinkle it with powdered sugar to create a pretty pattern.

Gosh, if only I knew someone who had several dozen random knitted doilies downstairs in a cupboard? Oh that’s right, it’s me!

Anyway. Here is my cake.

The sandtorte

Not the best backdrop, but by this point we had no power anywhere in the neighborhood so I had to make do with wherever the most light was available.

The interior is a cross between a pound cake and an angel food cake, which sounds like a complete oxymoron but I don’t know how else to describe it.

It’s a tasty enough cake, although there’s not a huge amount of flavor. I suspect this would be much improved with the addition of a cream or a sauce. Perhaps some lemon curd. Hmm. If only I knew of a small Meyer lemon shrub that routinely tries to overload me with fruit around this time of year…..

Making a thing a day for Thingadailies.


Dark in all the right ways

Be of good cheer, my faithful readers, because today I did not make soup! Instead I made focaccia. Chocolate focaccia, that is.

When King Arthur posted this recipe as their bake-of-the-week, I knew I had to give it a try. The yeasted dough is similar to a traditional focaccia recipe, with the addition of black cocoa to the batter (plus a tiny bit of sugar to counteract the bitterness of the cocoa), but then you knead it for 15 (!) minutes before stirring in some chocolate chips. After the first rise, it then goes into a pan prepped first with a puddle of olive oil – focaccia dough actually rises in an olive oil bath, which helps give it that characteristic slighty chewy outer texture. At the end of the rising time, another healthy glug of olive oil is drizzled over the top, then you use your fingers to poke it full of holes (I have no idea why focaccia has holes; I just know they’re required), and sprinkle some pearl sugar over the top.

I wasn’t entirely sure how this would work, since chocolate plus yeast dough isn’t always a winning combination, but oh my goodness, this turned out delicious!

It’s got the focaccia texture and open crumb interior, but with little pockets of chocolatey goodness, plus the occasional pop of sweetness from the pear sugar on the top.

Definitely worth the effort.

Making a thing a day for Thingadailies.


top