A long time ago the fats of choice for baking (and for cooking) primarily came from animals, because frankly, that’s what was available. It wasn’t until more recent history that we decided that animal fats were bad and started making fake fats that act the same as animal fats (and turn out to actually be worse than the original anyway), and the good stuff (at least in America) fell out of favor.
Yes, I’m talking about lard here. Lard, lard, larrrrrrrd (let’s face it, now you’re saying it in your head, ha, my work here is done!). I’ve played with it ever so briefly before, when a friend sent me a jar rendered from her own animals, and as long as that jar lasted I had a fierce discussion in my head every time I used it, which consisted mainly of ‘is this baked good lard-worthy?’ Because lard, I am here to tell you, makes some *delightful* baked goods. You want a super flaky crust? Bring on the lard! Biscuits that are soft as pillows and yet still flaky? Lard is your friend. Hooray for the lard!
Anyway! All this is to say that ever since I watched my first season of the Great British Bake Off I have been wanting to try hot water crust pastry, which uses lard but also hot water, which as any baker knows is the antithesis to flaky food. Except that apparently it isn’t! Because lard? I don’t know! We just don’t do this sort of thing in this country!
So for this month’s #BakingSisters challenge, we decided to tackle hot water crust pastry. And not only that, but we decided if we were going to do this, we were going to go all out, and so we did free-form, hand-raised pies, of the sort that are baked without any mold at all, just like they did back in the old days.
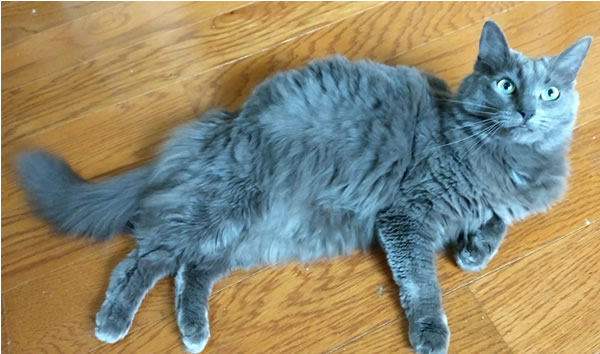
Cat interlude #1: Here, have a picture of a Sherman being cute!
So. We made our hot water crust pastry, which was really, really, *really* weird to work with. Since neither of us has ever done this before, we have no idea if we were doing it right, or if the consistency was correct, but we mixed up the weird goo anyway and then dutifully formed it over some pint jars, as per Paul Hollywood’s excellent instructions. Because the beauty of doing this sort of thing when one is *not* on a baking competition is that one has access to a recipe with *all* the steps, and not just vague hints.
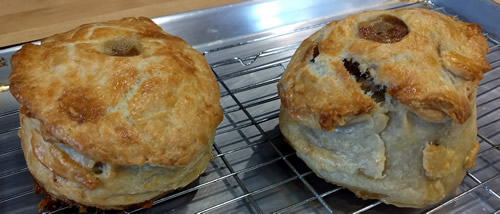
I didn’t take a picture of the jars before they were chilled (that was the next step) but here are the pies after I carefully peeled them off their jars (easier said than done) and then spent about fifteen minutes doing clumsy patchwork so as to avoid any structural failures later, and then stuffed them with filling. My sister made one around a jar, and then put the other into a tiny springform pan so technically only one of hers was truly free-form, but okay, if I actually owned a tiny springform maybe I would have done that too.
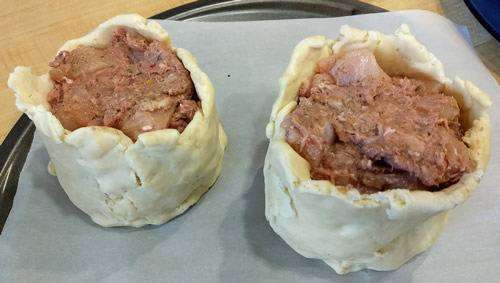
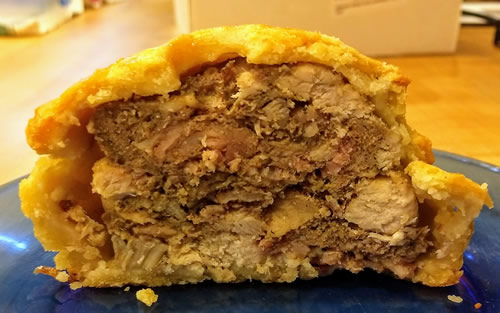
The filling was from a different recipe and is really just meat, meat, and more meat, with some salt and pepper and a bunch of other spices mixed in. This is because these things were originally designed for people who were heading off to do a full day of manual labor so they needed something that would be calorie dense and would also keep in decent condition wrapped in a cloth and stuffed in a pocket or a sack. Also meat is less likely to lose a lot of water and lead to a soggy bottom and we all know that the *last* thing you want is a soggy bottom!
Anyway, where was I? Oh, right, building my pies. Next you stick lids on top of the pies, into which you have carefully cut holes for the steam to escape, and you crimp (HA HA HA) it into place (the laughing is because neither of us actually *measured* our lids so they didn’t fit but luckily they were too big and thus provided extra dough for the structural spackling required earlier). Pro tip – make sure you cover the plate on which you were chilling the lids with plastic wrap or else you might have to chisel it off said plate prior to placing it atop the world’s ugliest hand raised pies. Ahem.
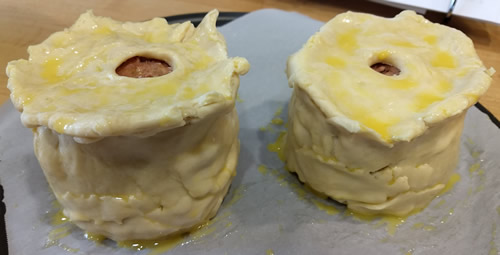
Then into the oven they go, for roughly an hour, during which you realize that the recipe makes wayyy too much meat filling, so then you decide to use the lard (lard, lard, larrrrd!) to make *more* pastry dough. Except without the hot water because that was just nasty.
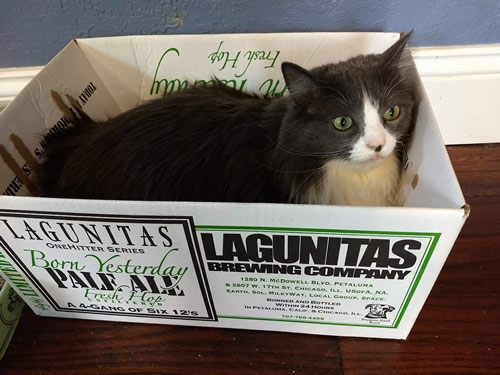
Interlude #2! Here’s a cat in a box! Said cat spent the majority of the entire baking session *whining* because I have no idea why except cats.
Finally the pies came out of the oven. I am pleased to report that my pies did not leak, nor did I have any significant structural failure (unlike my sister’s free-standing pie, which had a rather impressive blow-out on one side).
So. Once the pies are out of the oven, you are supposed to then pour in a mixture of broth and gelatin, which is supposed to fill in all the nooks and crannies to keep the meat moist or the pie from collapsing or something. I have no idea. All I know is that mixing broth and gelatin creates a concoction that smells absolutely *foul*. And also there was literally no room at the top of my pie in which to insert a funnel so that I could pour in the meat jello in the first place. So I didn’t end up doing that part.
And how, you may ask, did they taste?
Eh.
The filling was fine – a bit on the peppery side, but otherwise about what you’d expect if you mix sausage, bacon, and poultry together in a bowl and smash it into a pie crust. The crust is sturdy and yet still a bit flaky.
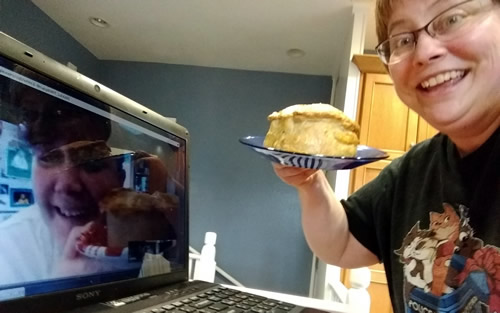
Overall, it was fun to try, although I have a feeling neither of us is going to be dashing off to work with hot water crust pastry again any time soon. And I am quite happy to report that were no soggy bottoms on either side of the webcam (Mary Berry would be so proud).
Mmm. Lard.
The crust was very flakey and delicious. The filling was very strong on pepper. But the crust……ah, the crust……