Still Life, With Cats

This content shows Simple View

Treacly

Happy Molasses Bar Day!

I am very excited about this because I love the combination of molasses and all the dark, sweet spices that usually go along with it, and prior to this little challenge I had never even *heard* of molasses bars, so this is a brand new (to me) recipe. Is it a regional thing? I don’t know! Who cares! Let’s make some molasses bars and then eat every single one of them in one sitting!

A quick search of the internets finds a variety of things called ‘molasses bars’ so I am not actually sure if the one I made is the ‘true’ molasses bar, or if there is such a thing as a ‘true’ molasses bar, but I digress. Basically this comes together like a stiff cookie dough – the sort that is usually rolled out and cut out with cookie cutters, except that for these, you grease and flour a cookie sheet (did they provide a size for this? No, they did not, which is a bit frustrating as cookie sheets come in a wide range of sizes) and then you press the dough into the cookie sheet (this will be messy! Use lots of flour) and then you bake what is essentially a ginormous soft molasses cookie. The recipe calls for raisins, but as previously discussed on this site, raisins are Not Food, and thus, I ignored that ingredient, because why sully such a delicious morsel with those grape abominations? Why?

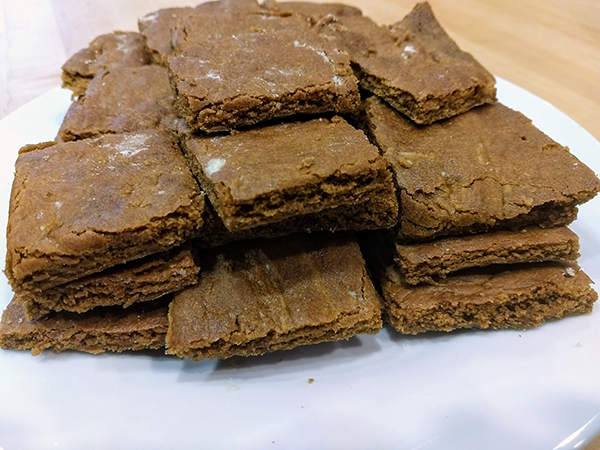
Here they are in all their molassesy glory.

Verdict: Absolutely delightful. I am saving this recipe and will definitely be making them again. Like most things made with molasses and those spices, they need time to sit, so the flavors come through, and are thus likely to be much tastier the day after, than fresh from the oven (although fresh from the oven is also quite delicious). Also one batch makes a bunch, so it’s convenient that Richard’s writers group met at our house tonight, so that the bars could be distributed among a larger group of people and thus were not left to sit on the counter to tempt me.

Making a thing a day for Thingadailies.


Pastability

Today is Fettuccine Alfredo Day. No, I have no idea why. Mine is not to question; mine is only to produce the food and comment on its tastiness (or lack thereof).

I love fettuccine alfredo. LOVE. But it’s not the sort of thing that one really needs to be making and/or consuming on a regular basis when one comes from sturdy peasant stock genetically engineered to withstand famine, so it’s more the type of food I only eat when out at a restaurant, and not so much when I’m pondering meal plans at home.

But this month is all about making whatever the National Day’s food is, so I hit up Google and looked for some slightly lighter versions. The classic recipe starts with a roux, which is just butter and flour, but then continues on with cream and lots of cheese, and people, there is a *reason* why it is so incredibly delicious.

This recipe, however, makes it ever so slightly less a calorie-bomb, in that it makes use of milk and broth instead of the cream. The roux is still there, of course, because that’s the thickening agent, and also the cheese, because without cheese what would be the *point*?

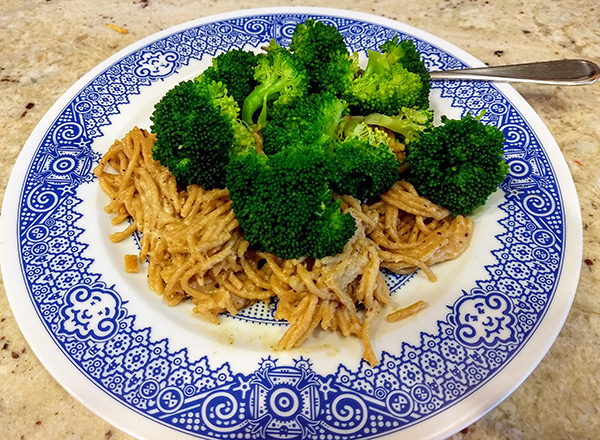
We had it with a pile of steamed broccoli on top, because it really needed some color and also some additional texture. I would have sprinkled more Parmesan on top of that (because the answer to so many things about food is ‘more cheese’), except that I used up every bit of Parmesan in the house to make the sauce. Alas.

It’s not as pretty here as it could have been, but that’s only because I made it this morning, before heading off to work since there wasn’t going to be time after work to make it before Richard needed to leave for his meeting, and this is not a dish that reheats into the same beautiful vision as it is when it’s first cooked. Also I didn’t use fettuccine, because there wasn’t any in the house and pasta is pasta is pasta (yes, yes, I know, you purists out there are violently disagreeing with me, but you can just go make your own and be done with it).

It tasted fine, although not exactly like true fettuccine alfredo. I might be tempted to up the spices a bit next time, if I ever decide to make it again, and also add some chicken. And also some cream, because there is a reason the original recipe is so very much better.

Making a thing a day for Thingadailies.


Frozen

Today is Frozen Yogurt Day. I hope you all celebrated appropriately.

Me, I forgot to check the calendar this morning and had a small panic when I remembered that today was a day that would require an ice cream maker, and that means the ice cream maker base had to be frozen, and oops, it was still sitting on the counter.

Luckily Google came to my rescue (all hail our robot overlords) with this recipe that requires no ice cream maker at all. Richard swung by the grocery store on the way home to pick up the necessary ingredients (frozen peaches) and after dinner tonight we broke out the food processor and gave it a whirl (ha, see what I did there).

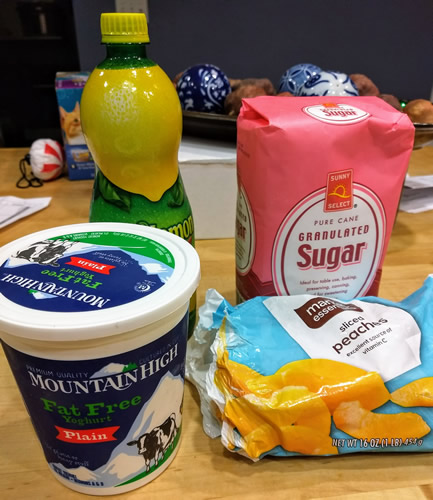
You start with frozen peaches, yogurt, sugar, and lemon juice.

Then you blend the peaches and the sugar until they’re mostly combined, and add in the other two ingredients. It sounds pretty simple. Except that when we tasted it, the sugar didn’t really dissolve so it was kind of weirdly grainy, and there wasn’t much of any flavor at all.

Inspiration struck. I tossed in about a teaspoon of orange extract (doesn’t everyone have that in their cupboard?), added a little more sugar and a dash of vanilla as well, and then blended it like crazy and stuffed it into the freezer to sit and think about what it had done, and also in the hope that this would give everything a chance to meld.

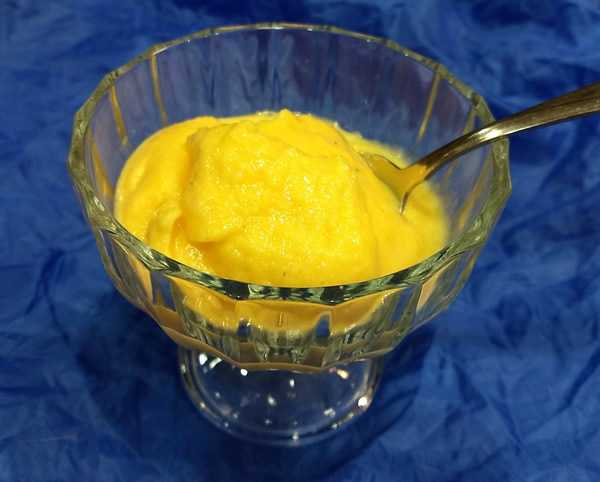
And hey, what do you know, it worked!

Half an hour in the freezer and the sugar had all dissolved into the rest of the mixture, and the orange flavor came through. Still can’t taste peach at all, but no matter, the orange made it perfectly yummy, and we both agreed we might be willing to make this again.

Making a thing a day for Thingadailies.


Melted

Today was perhaps the easiest day of this month’s challenge. Because today is both World Nutella Day, and Chocolate Fondue Day (not to be confused with *Cheese* Fondue Day, which is in April, and if you don’t think we’ll also be celebrating that, then clearly you don’t know me at *all*).

Seriously, these two could not have been planned better. And since Mondays are the worst day for me to try to do anything in general, due to work during the day and rehearsal in the evening, the combination was even better, because it went together in about two minutes, max.

So…ready for this highly complicated recipe that combines both important celebrations?

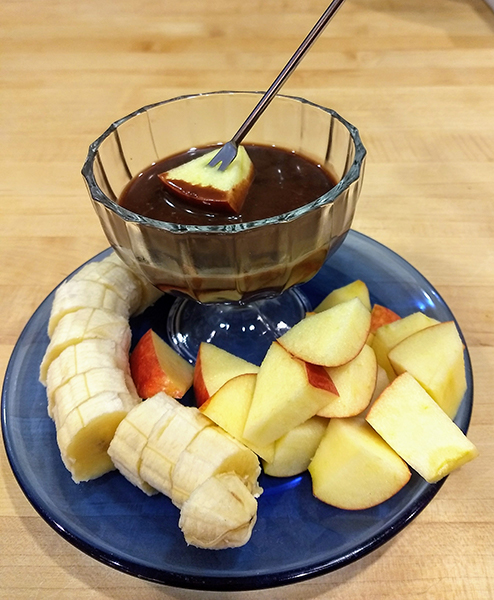
Here you go: 1/2 cup Nutella and 1/2 cup cream. Heat the cream, stir in the Nutella, serve with bite-sized items for dipping.

We pondered what to dip into our Nutella fondue, but decided fruit would make it feel more virtuous, so went with apple and banana. Also pretty much the only way I will ever voluntarily eat a banana is if it can be smothered in enough chocolate so that I can’t actually *taste* it, so bonus for getting my annual ‘I suppose I ought to eat a banana’ day out of the way early for the year!

Making a thing a day for Thingadailies.


That would be a nope

Today is National Homemade Soup Day, so naturally I had to make soup. While pondering what soup to make, I rummaged through my recipe cards and stumbled across a recipe for White Bean and Bacon soup. It was in my handwriting, so clearly I had made this before and we liked it enough to decide to keep it, but neither Richard or I could remember a thing about it.

It’s a pretty simple soup. You cook up a couple strips of bacon, then set those aside and cook onion and garlic on low heat until they’re nearly translucent, and then you toss in some stock and some beans and some basil and red pepper flakes and simmer that for 20 minutes or so, and after all that, then you blend it all together and finish it off with a dash of cream and the crumbled bacon.

That would have been perfectly fine on its own, but then I discovered that it’s also Yorkshire Pudding Day. As far as I’m aware, I’ve never tasted this, and conveniently my 40+ year old Betty Crocker cookbook has a recipe, so I figured I’d give it a try.

The recipe starts off by mixing flour, eggs, and milk into a bowl. But then it gets weird. This recipe assumes you are making alongside a beef roast, so you collect a half cup of drippings. And if there isn’t a half cup available while you’re cooking your roast, you are to melt shortening and add it until you reach the full amount.

So….one half cup of melted fat. Okay. I figured, hey, the soup has bacon, and I do have a jar of bacon fat in the refrigerator, so I could just use that, so it’d go with the soup.

One half cup of melted fat is a lot of fat, by the way. A *lot*. This should have been my first clue.

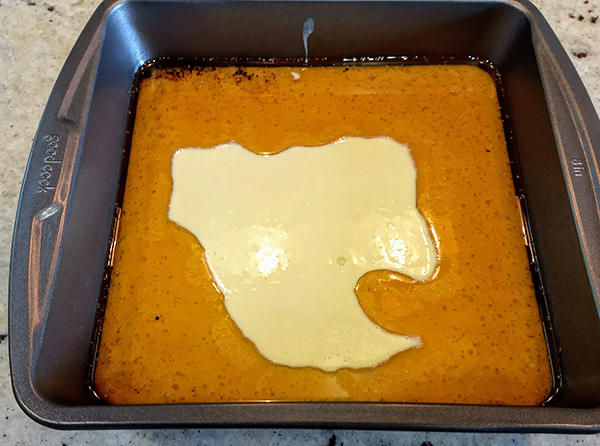
Next you pour the drippings / melted shortening / bacon grease – into a pan and you pour your flour and milk mixture on top of that, like so. At first glance, it looks as if this is some kind of weirdly shaped pancake floating in a sea of maple syrup, doesn’t it? But no. That’s all melted bacon grease.

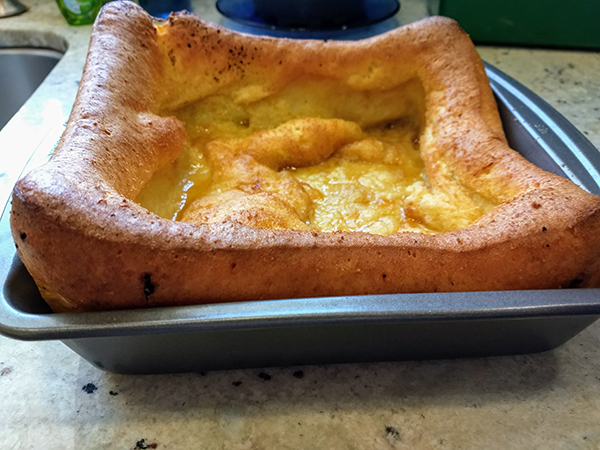
Finally, you throw the pan in the oven and bake it for about half an hour, which was conveniently the time required to simmer the soup. The pudding puffed alarmingly high on the sides, but the middle, even though it was cooked, did not.

I suspect because there is only so much dough can do to counteract the presence of an entire HALF CUP of grease in the pan.

Verdict: The soup was delicious (yay to past me for saving this recipe!), but the pudding was….not. The sides that had puffed above the grease line were a bland bread sort of thing, but the middle part was pretty much what you might expect for a piece of baked dough that’s been soaking in grease for half an hour. It was *dripping*, people. Shudder.

I freely admit that, because I’ve never made this, and also because puddings of this type are not a typical American dish, that it is highly likely did something wrong with the recipe, or maybe bacon fat just isn’t the best thing to use, but….yeah, no. Not motivated to try this one again. Ever.

Making a thing a day for Thingadailies.


When a cow and a rabbit become very good friends…

Today is both Ice Cream for Breakfast Day, and Carrot Cake Day, so obviously we had to celebrate both.

Ice Cream for Breakfast Day, according to Wikipedia (which as we all know is the absolute *epitome* of factual accuracy, cough cough), was invented in the 1960’s by an exasperated mother. I have a sneaky feeling that Ice Cream for Breakfast Day was actually invented a lot earlier than that, (in fact I’m pretty sure it came into being the morning after the invention of ice cream in the first place), but the formal designation of it as a National Day is a more recent thing, if only because the ability to submit weird and wacky food-related days via the internet to a gathering house sort of website wasn’t around back when ice cream magically popped into being. Think what all those ancients were missing out on.

I like ice cream, obviously, but I am ambivalent about carrot cake. On the one hand, it’s usually a lovely, moist cake and there is usually cream cheese frosting involved. On the other hand, it is far too often used as a vehicle for raisins, which are a horrible thing to do to a grape and are therefore Not Food. Luckily if I’m making it myself, I can avoid the Not Food parts of the recipe. Ah, the power of being a home baker.

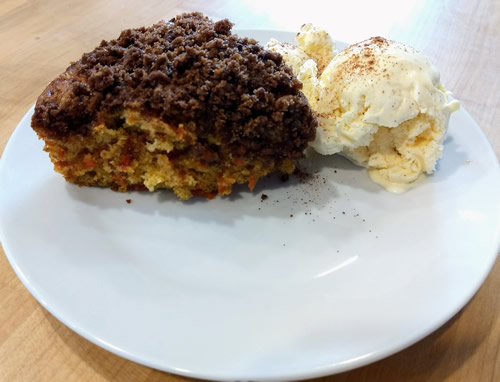
I admit I did go Googling for recipes for carrot cake ice cream (and trust me, there’s quite a few out there) but then I got to thinking about how ice cream by itself isn’t a very filling breakfast, and cake would be a much better option, and also there’s still vanilla bean ice cream in the freezer so I really didn’t need to be making *more*…all of which is to say that this morning, we started the day with some vanilla bean ice cream and a slice of this Carrot Cake Coffee Cake, which covered both bases.

The recipe calls for 2 cups of shredded carrots. Therefore one serving totally counts as a serving of vegetables for the day. Yum.

Making a thing a day for Thingadailies.


Ooh la la

Today is La Chandeleur, which is a French holiday where they eat crepes (I am sure there’s probably a lot more to it than that, but the only part I care about is the crepe part, because yum, crepes!). Today is also National Tater Tot Day, except that I couldn’t figure out a way to incorporate tater tots into crepes, nor did I really want to because ew, so actually let’s just forget I mentioned the tots. Today is all about the crepe!

I’ve made crepes lots of times, because they’re kind of fun and also tasty. Basically crepe batter is really just pancake batter with extra liquid stirred in, so you could probably make them with any standard pancake recipe, with some minor adjustments (well, any pancake recipe that doesn’t include a lot of chunky bits; you are aiming for thin, smooth batter, after all). You don’t need a special pan; all you need is a regular frying pan and a non-metal spatula (I use a silicone one – the type you use to scrape down the sides of a bowl) because a metal spatula is more likely to tear your delicate pancakes.

Two things to keep in mind to make a successful crepe are low heat, and oil. The pan needs to be lubricated (nonstick spray works just fine here) and it can’t be too hot, because once you pour in the batter, you then need to very quickly tilt the pan around so that the batter spreads out as thinly as possible. Too high a heat, and the batter will cook too fast, so your crepe will end up too thick, or lumpy. The oil is because these things are really delicate, since they’re so thin, so you want to prevent them sticking, or else your lovely smooth crepe will turn into a shredded, sad mess.

Crepes are extremely versatile and work just as nicely with savory as well as sweet fillings, so one batch takes care of both dinner and dessert. With that in mind, for dinner tonight, we had crepes stuffed with ham, mushrooms, and swiss cheese.

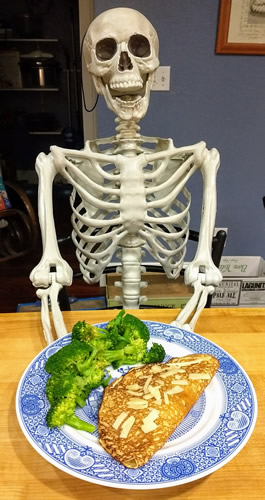
Cornelius M. Peabody, III was quite excited about his. He’s a big fan of crepes.

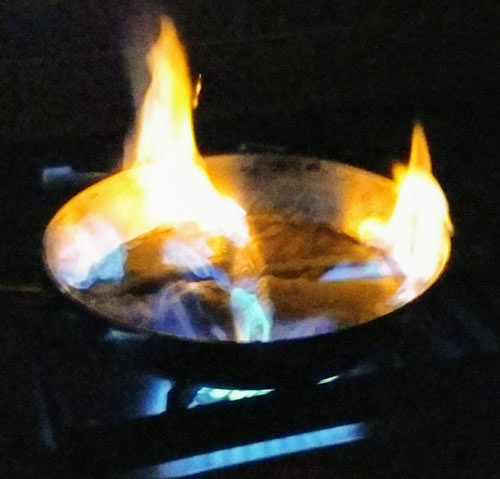
And for dessert, we decided to light things on fire!

Or in other words, I made Crepes Suzette, which is a fancy way of saying I mixed orange juice, butter, and sugar in a pan until it reduced, and soaked the crepes in that, and then poured some alcohol over the crepes and set it on fire. Which, by the way, is another thing that would have been a whole lot easier to do if I only had a kitchen torch. Ah well.

The crepes were all quite tasty.

The cats were all, as usual, unimpressed.

Making a thing a day for Thingadailies.


Cloudy with a chance of ice cream

Hooray, it’s February, which means it’s once again time for Thingadailies! In years past I’ve knit dishcloths and crocheted teeny tiny snowflakes, but I was having a hard time coming up with what to do this year. Despite the fact that there are plenty more snowflakes in that book, I wasn’t really feeling the snowflake love for a third year in a row, nor was anything knit jumping out at me.

Then my little sister shared an event for Ice Cream for Breakfast for this coming Saturday (why yes, that *is* foreshadowing!), and curious, I started tracking down why this was apparently a thing, and it turns out there are entire websites devoted to all the weird days of the year, and I started looking through all the National Days for February, and thus, my plan for 2018 was born. Every day for the month of February, I will be making something having to do with whatever that day’s National Day is.

Luckily we’re starting off with something easy, because February 1st is National Baked Alaska Day. This is a dessert that looks complicated but it actually isn’t, because all it requires is cake, ice cream, and some meringue. No sweat!

First you start with some cake. Any cake will do, but for the purposes of tonight’s bake, I used this recipe, because there are only two of us and Baked Alaska isn’t really a thing that keeps well, and also last Saturday was National Chocolate Cake Day (go on, Google it, I’ll wait), so technically I made the cake for that, except I put it into two little mini tart pans and saved one of the cakes for today.

Then you pick some ice cream and you shape it into an appropriately sized blob. I used vanilla bean, because that pairs well with chocolate. I’m sure there’s some fancy schmancy way to form an ice cream blob to go atop your cake, but I just stuffed another mini tart pan with ice cream this morning and tossed it into the freezer and figured that would work.

Finally, you need some egg whites and sugar, which you whip into meringue. This takes several minutes, which means you have plenty of time to chisel the ice cream out of the mini tart pan (pro tip – line your tart pan with plastic wrap before filling it with ice cream, which is a thing I did *not* think to do until after the fact, hence the chiseling part of the equation), but you also have time to then lick all the extra ice cream out of the tart pan once you’ve extracted the vaguely tart-pan-shaped blob and placed it on top of the cake.

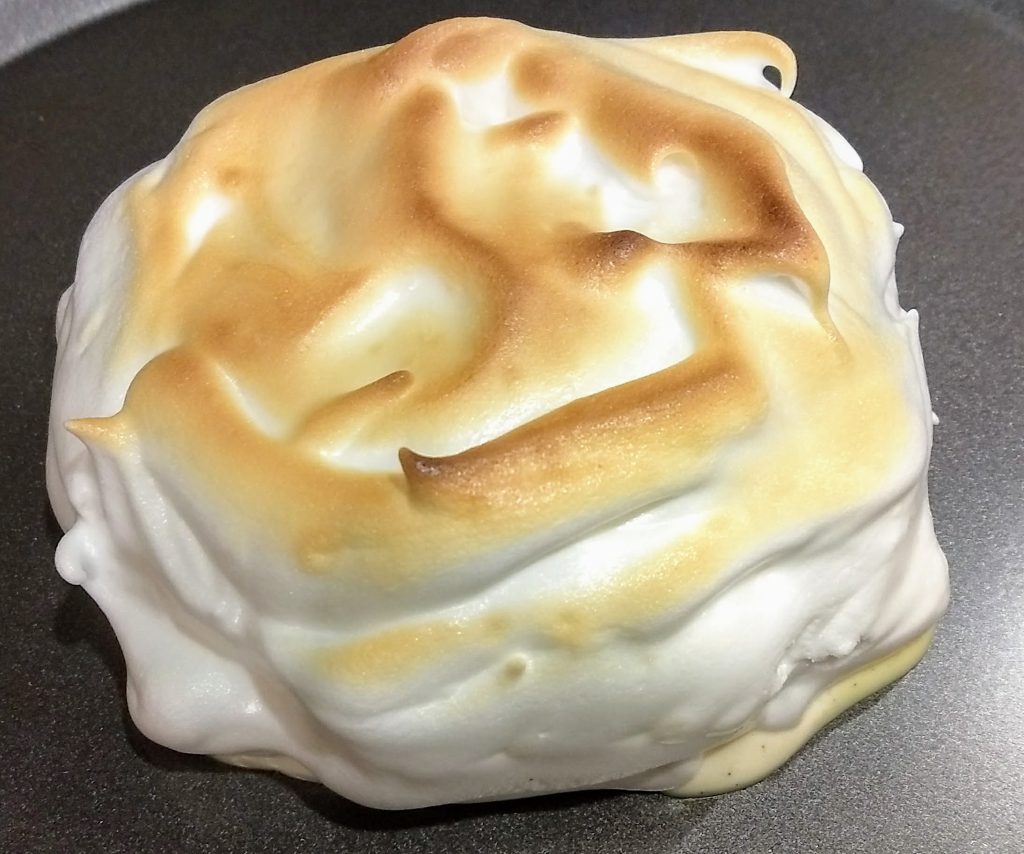
Next you stuff all the whipped meringue into a piping bag and if you are a trained pastry chef or someone who is actually good at decorating you cover your ice cream-topped cake with a beautiful array of meringue rosettes. Or if you are someone like me, you sort of blob meringue randomly all over the place until it looks like someone melted the head of the Staypuff Marshallow Man on a pan (because you have to make sure the ice cream is completely covered), and then you either torch it (if you happen to have a kitchen torch) or else you stick it under the broiler until the top is golden brown and hopefully not burnt, or until you notice that ice cream is leaking out the bottom and you hastily extract it from the oven before it all dissolves.

Here is my *beautiful* Baked Alaska. I totally meant for it to look like this. Um. Yeah.

You may note the ice cream, leaking out at the bottom there. Oops.

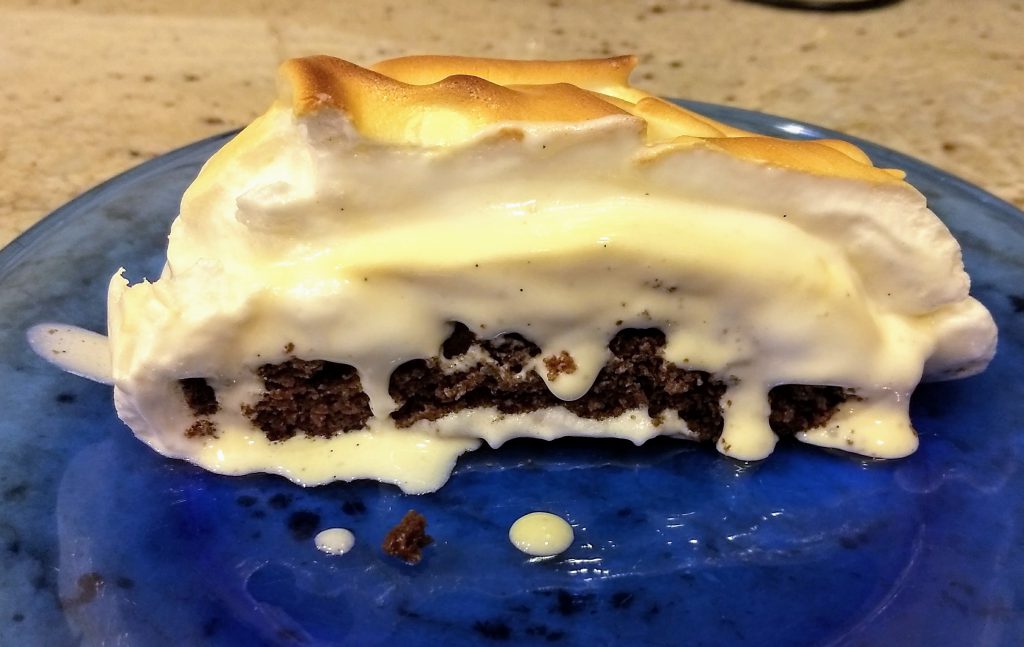
This is the cut view. The ice cream was really starting to melt by this point so I’m sure it could be a lot prettier but oh well!

Verdict – it might not look like much, but it was quite, quite delicious. The meringue was soft and airy and was not too sweet, which I was admittedly a bit worried it would be. I might actually be tempted to try this again.

Making a thing a day for Thingadailies.


The word of the day.

A long time ago the fats of choice for baking (and for cooking) primarily came from animals, because frankly, that’s what was available. It wasn’t until more recent history that we decided that animal fats were bad and started making fake fats that act the same as animal fats (and turn out to actually be worse than the original anyway), and the good stuff (at least in America) fell out of favor.

Yes, I’m talking about lard here. Lard, lard, larrrrrrrd (let’s face it, now you’re saying it in your head, ha, my work here is done!). I’ve played with it ever so briefly before, when a friend sent me a jar rendered from her own animals, and as long as that jar lasted I had a fierce discussion in my head every time I used it, which consisted mainly of ‘is this baked good lard-worthy?’ Because lard, I am here to tell you, makes some *delightful* baked goods. You want a super flaky crust? Bring on the lard! Biscuits that are soft as pillows and yet still flaky? Lard is your friend. Hooray for the lard!

Anyway! All this is to say that ever since I watched my first season of the Great British Bake Off I have been wanting to try hot water crust pastry, which uses lard but also hot water, which as any baker knows is the antithesis to flaky food. Except that apparently it isn’t! Because lard? I don’t know! We just don’t do this sort of thing in this country!

So for this month’s #BakingSisters challenge, we decided to tackle hot water crust pastry. And not only that, but we decided if we were going to do this, we were going to go all out, and so we did free-form, hand-raised pies, of the sort that are baked without any mold at all, just like they did back in the old days.

Cat interlude #1: Here, have a picture of a Sherman being cute!

So. We made our hot water crust pastry, which was really, really, *really* weird to work with. Since neither of us has ever done this before, we have no idea if we were doing it right, or if the consistency was correct, but we mixed up the weird goo anyway and then dutifully formed it over some pint jars, as per Paul Hollywood’s excellent instructions. Because the beauty of doing this sort of thing when one is *not* on a baking competition is that one has access to a recipe with *all* the steps, and not just vague hints.

I didn’t take a picture of the jars before they were chilled (that was the next step) but here are the pies after I carefully peeled them off their jars (easier said than done) and then spent about fifteen minutes doing clumsy patchwork so as to avoid any structural failures later, and then stuffed them with filling. My sister made one around a jar, and then put the other into a tiny springform pan so technically only one of hers was truly free-form, but okay, if I actually owned a tiny springform maybe I would have done that too.
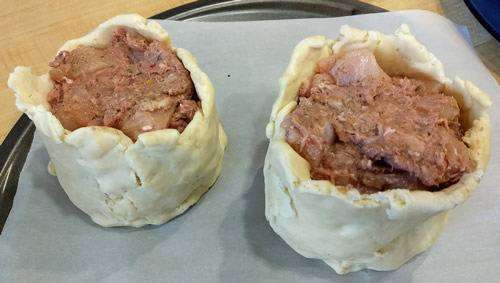
The filling was from a different recipe and is really just meat, meat, and more meat, with some salt and pepper and a bunch of other spices mixed in. This is because these things were originally designed for people who were heading off to do a full day of manual labor so they needed something that would be calorie dense and would also keep in decent condition wrapped in a cloth and stuffed in a pocket or a sack. Also meat is less likely to lose a lot of water and lead to a soggy bottom and we all know that the *last* thing you want is a soggy bottom!

Anyway, where was I? Oh, right, building my pies. Next you stick lids on top of the pies, into which you have carefully cut holes for the steam to escape, and you crimp (HA HA HA) it into place (the laughing is because neither of us actually *measured* our lids so they didn’t fit but luckily they were too big and thus provided extra dough for the structural spackling required earlier). Pro tip – make sure you cover the plate on which you were chilling the lids with plastic wrap or else you might have to chisel it off said plate prior to placing it atop the world’s ugliest hand raised pies. Ahem.
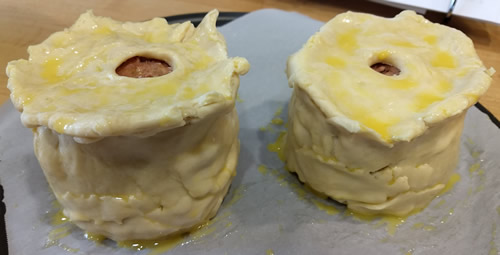
Then into the oven they go, for roughly an hour, during which you realize that the recipe makes wayyy too much meat filling, so then you decide to use the lard (lard, lard, larrrrd!) to make *more* pastry dough. Except without the hot water because that was just nasty.

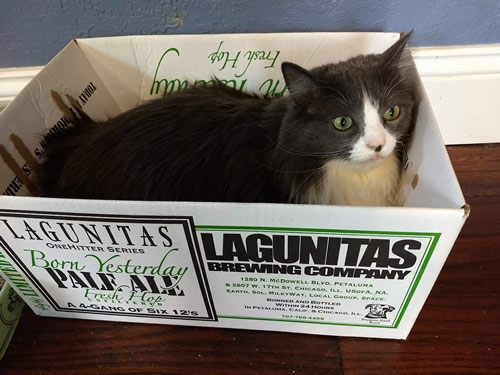
Interlude #2! Here’s a cat in a box! Said cat spent the majority of the entire baking session *whining* because I have no idea why except cats.
Finally the pies came out of the oven. I am pleased to report that my pies did not leak, nor did I have any significant structural failure (unlike my sister’s free-standing pie, which had a rather impressive blow-out on one side).
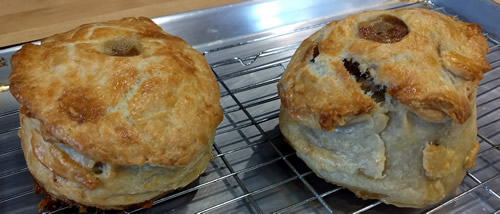
So. Once the pies are out of the oven, you are supposed to then pour in a mixture of broth and gelatin, which is supposed to fill in all the nooks and crannies to keep the meat moist or the pie from collapsing or something. I have no idea. All I know is that mixing broth and gelatin creates a concoction that smells absolutely *foul*. And also there was literally no room at the top of my pie in which to insert a funnel so that I could pour in the meat jello in the first place. So I didn’t end up doing that part.

And how, you may ask, did they taste?

Eh.

The filling was fine – a bit on the peppery side, but otherwise about what you’d expect if you mix sausage, bacon, and poultry together in a bowl and smash it into a pie crust. The crust is sturdy and yet still a bit flaky.
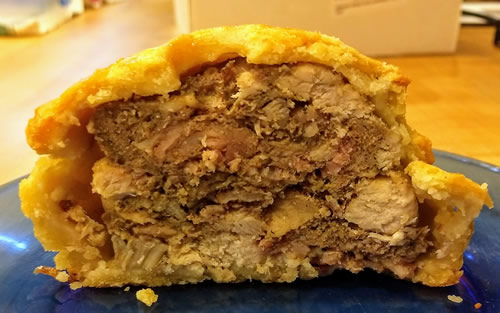
Overall, it was fun to try, although I have a feeling neither of us is going to be dashing off to work with hot water crust pastry again any time soon. And I am quite happy to report that were no soggy bottoms on either side of the webcam (Mary Berry would be so proud).
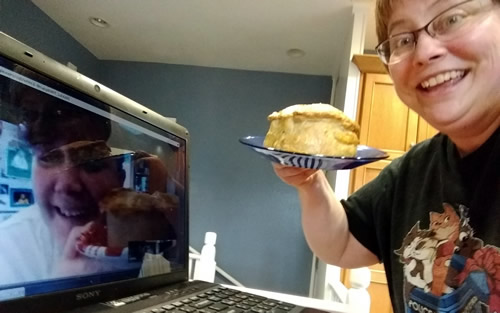
Mmm. Lard.
So that happened

You may (or may not!) have noticed that I failed rather spectacularly at Holidailies this year, but this time I actually had a reason!

A year or so ago I noticed I was getting all these weird ads popping up all over my site. Richard dug around in the code, found the problem, removed it (took a couple times to make it ‘stick’) and installed a new plug-in that would hopefully prevent this from happening again. But we are now wondering if maybe we missed something because last month, Norton started popping up giant warning signs, and yeah, turns out the site got hacked.

So over the past few weeks Richard’s cleared out code, and then there’d be another problem, and then he’d go digging and find yet *more* code, and then we got our host company involved, and they dug out even *more* corrupted files, and then we decided to install SSL certificates or whatever they’re called to hopefully prevent this from happening again (we applied those to all the domains we host, because why not!) but meanwhile Google Chrome keeps insisting that my site is dangerous (even though all the other browsers now seem happy with it, as well as Norton) so hopefully that’s just because their system holds on to suspicious URLs for a bit and that’ll eventually clear out, and not because there’s something still lurking.

But I guess in the grand scheme of things, after running this thing for holy crap 18 years now, getting hacked only once isn’t so surprising.

So! I’m back (I hope, fingers crossed!) and I’ll be playing a little bit of catch-up over the next couple weeks on some stuff that’s happened the last month or two, and also meanwhile I hope whoever wrote the bot that messed things up develops an incurable itch in their private parts that NEVER, EVER goes away.


top