Still Life, With Cats

This content shows Simple View

Baking Sisters

Roly-poly

Today is National Cream Cheese Brownie Day, but I’m not actually going to talk about that, because there won’t be any of those in this house. Not that I have any issues with Cream Cheese Brownies – they are quite tasty – but because today was this month’s #BakingSisters day, so instead of doing the National Day thing, we made mini Swiss rolls.

Originally we were going to use this recipe, which was used in a Technical Bake in the most recent season of Great British Bake Off, but then I went a-Googling, and found some other options, and so instead, I used the cake from this recipe, and the filling and ganache from this one. I do love peppermint and the thought of peppermint cream inside tiny little chocolate cakes sounded delightful but that was going to end up as an awful lot of peppermint for the weekend (spoilers!), so I went with peanut butter instead.

My pastry-chef-by-training sister recommended that a sponge would be a better option than the cake we’re more familiar with in America, so we started with that. You mix eggs and sugar over a double boiler until the sugar is dissolved, and then decant that into a mixer and whip until it’s pale yellow and fluffy. Then you carefully fold in a mix of flour, cocoa, and salt, and also some melted butter.

I was *so* careful when folding (I’ve seen enough people on GBBO fold too quickly and lose all their volume) but my batter still shrunk a lot by the time I was done, so maybe I didn’t get the egg and sugar mix whipped enough to start with. Who knows!

Next you spread the batter out into prepared sheet pans (covered with parchment paper and then greased and sprinkled with cocoa powder). Here is mine.
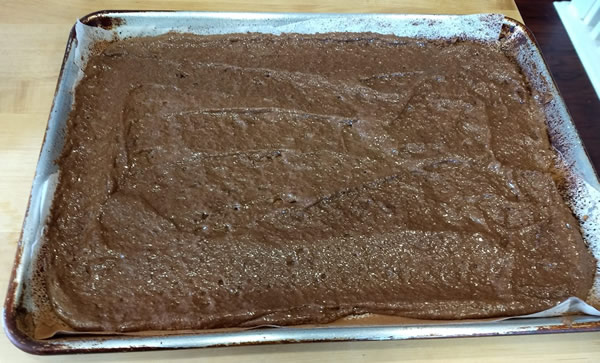
It looks kind of sad. My sisters was a much lighter color and filled her sheet to the rim, so clearly one of us had a misstep, and considering which of us has had prior training, I’m guessing it was me!

Then it goes into the oven and bakes for 6 minutes, and as soon as it’s out, you immediately dump it out of the pan onto a clean kitchen towel that’s been sprinkled with cocoa powder. Hah. My sister was frantically warning me ‘cut the corners!’ so the cake wouldn’t stick to the pan, but, uh, see above for why that was not remotely an issue for my cake.
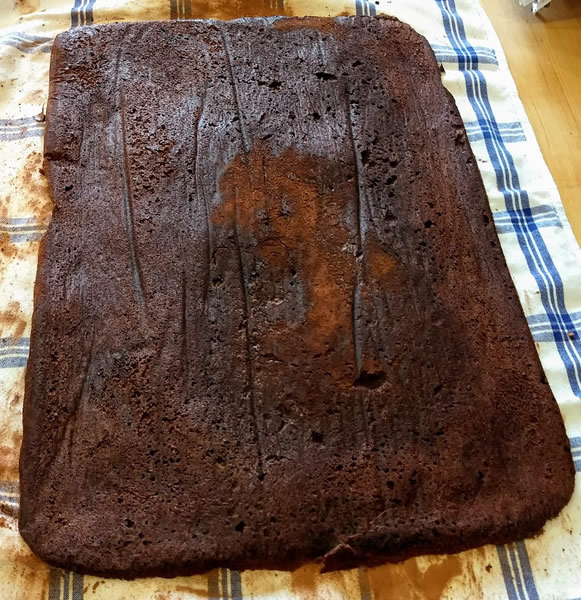
After it’s onto the dish towel, you roll it up right away, apparently so that the cake then has the ‘memory’ of the roll once it’s cooled. Which sounds really really weird to say but totally works.

While that cooled on the counter, then we made the fillings. My sister made two fillings – one peanut butter and one caramel, but I stuck with just the peanut butter filling, which is really just peanut butter buttercream. It is, by the way, insanely delicious and I was a Very Loving Wife when I let Richard lick the whisk attachment after I was done instead of keeping it all to myself, even though I was VERY VERY tempted.

So once the cake is cooled, then you unroll it, *carefully*, and fill it. Because we were making tiny rolls, we first cut the cake into quarters, and then filled each one individually and rolled those up. I did not, for some bizarre reason, take a picture of them pre-rolled, but here they are, after being rolled up, and before going into the freezer to chill.
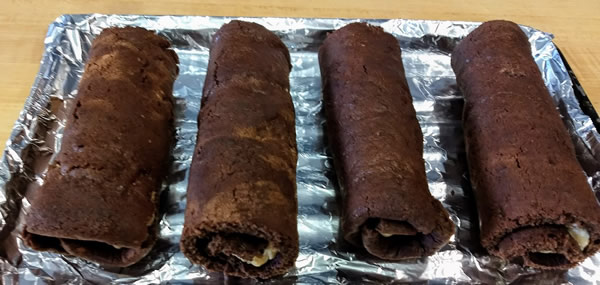
I am quite pleased to report that there was minimal cracking on any of my rolls! I know this is an issue because every time there is a rolled cake challenge on GBBO, someone has a massive cracking failure, so hooray for the lack thereof! Also, if some pieces fell off the ends, well quality control is important and the cake tasted quite fine.

After the cakes were chilled enough that the filling was firm inside, then we cut them into pieces.
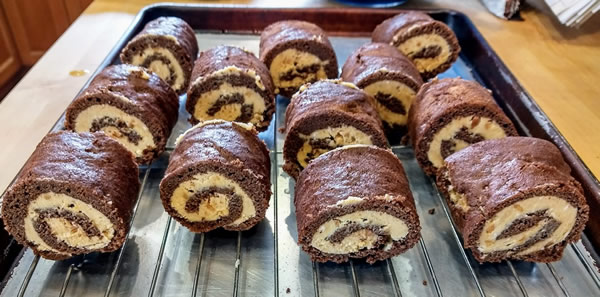
Aren’t they pretty? I totally didn’t make sure to turn them all so that the nicer side face the camera, nope, not at all.

The final step was ganache, so we heated up cream (or in my case half and half, because that’s what I had in the fridge) and poured that over chocolate and corn syrup, and whisked that together until it was smooth and lovely, and then poured it over the little cakes.

The recipe called for dunking each cake individually but that seemed like a lot of hassle, and I was worried there would end up being too much chocolate and the peanut butter flavor would be lost. So instead I just spooned it over the tops of mine, so the pretty swirls were still visible (well, except for a few drips), and then sprinkled them with chopped peanuts.
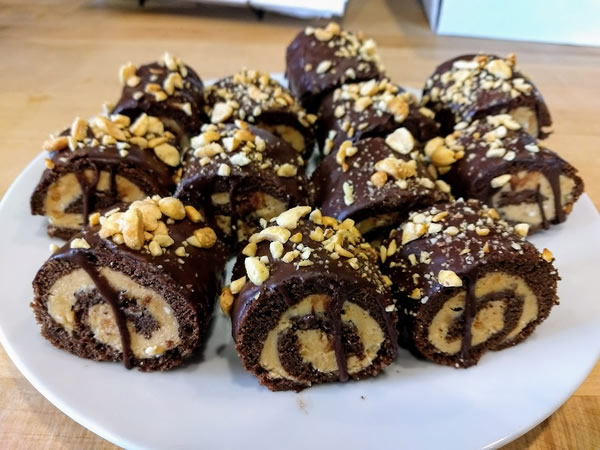
Also when one is the baker and there are trimmings and leftover filling and ganache, one *has* to do more quality testing. For..um..science. Many yummy noises were made on both sides of the camera. So many.

Here we are with our finished rolls! This is from my sister’s side of things, because I had to use both hands to hold up my tray, and she was thus the only one with an available hand to work the camera.
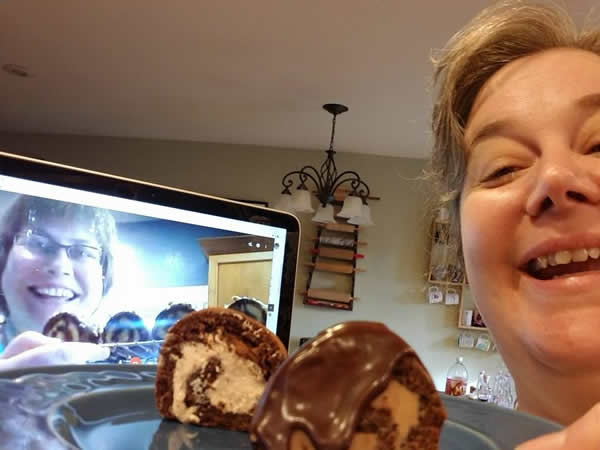
And how, you might ask, do they taste?

SO VERY AMAZING. The peanut butter filling is very light and fluffy and really helps counteract the dark chocolate of the ganache and the cake. Five stars, would totally make again some day when I have lots of hours to spare and don’t mind turning the kitchen into a cocoa-powder-coated disaster zone again.

Making a thing a day for Thingadailies.
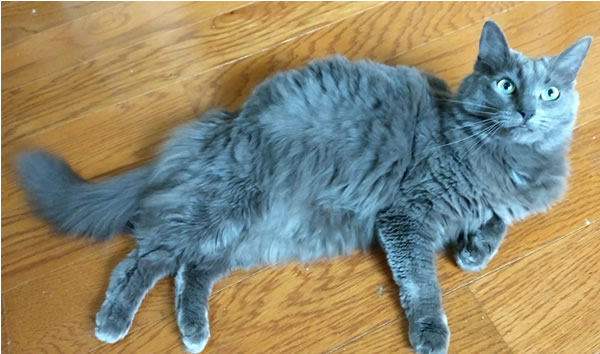


The word of the day.

A long time ago the fats of choice for baking (and for cooking) primarily came from animals, because frankly, that’s what was available. It wasn’t until more recent history that we decided that animal fats were bad and started making fake fats that act the same as animal fats (and turn out to actually be worse than the original anyway), and the good stuff (at least in America) fell out of favor.

Yes, I’m talking about lard here. Lard, lard, larrrrrrrd (let’s face it, now you’re saying it in your head, ha, my work here is done!). I’ve played with it ever so briefly before, when a friend sent me a jar rendered from her own animals, and as long as that jar lasted I had a fierce discussion in my head every time I used it, which consisted mainly of ‘is this baked good lard-worthy?’ Because lard, I am here to tell you, makes some *delightful* baked goods. You want a super flaky crust? Bring on the lard! Biscuits that are soft as pillows and yet still flaky? Lard is your friend. Hooray for the lard!

Anyway! All this is to say that ever since I watched my first season of the Great British Bake Off I have been wanting to try hot water crust pastry, which uses lard but also hot water, which as any baker knows is the antithesis to flaky food. Except that apparently it isn’t! Because lard? I don’t know! We just don’t do this sort of thing in this country!

So for this month’s #BakingSisters challenge, we decided to tackle hot water crust pastry. And not only that, but we decided if we were going to do this, we were going to go all out, and so we did free-form, hand-raised pies, of the sort that are baked without any mold at all, just like they did back in the old days.

Cat interlude #1: Here, have a picture of a Sherman being cute!

So. We made our hot water crust pastry, which was really, really, *really* weird to work with. Since neither of us has ever done this before, we have no idea if we were doing it right, or if the consistency was correct, but we mixed up the weird goo anyway and then dutifully formed it over some pint jars, as per Paul Hollywood’s excellent instructions. Because the beauty of doing this sort of thing when one is *not* on a baking competition is that one has access to a recipe with *all* the steps, and not just vague hints.

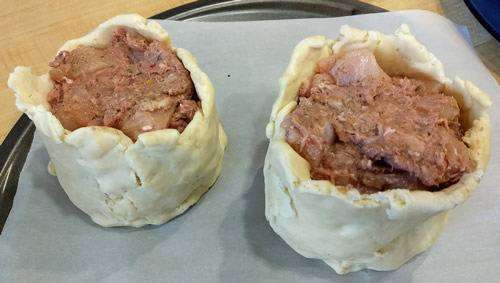
I didn’t take a picture of the jars before they were chilled (that was the next step) but here are the pies after I carefully peeled them off their jars (easier said than done) and then spent about fifteen minutes doing clumsy patchwork so as to avoid any structural failures later, and then stuffed them with filling. My sister made one around a jar, and then put the other into a tiny springform pan so technically only one of hers was truly free-form, but okay, if I actually owned a tiny springform maybe I would have done that too.

The filling was from a different recipe and is really just meat, meat, and more meat, with some salt and pepper and a bunch of other spices mixed in. This is because these things were originally designed for people who were heading off to do a full day of manual labor so they needed something that would be calorie dense and would also keep in decent condition wrapped in a cloth and stuffed in a pocket or a sack. Also meat is less likely to lose a lot of water and lead to a soggy bottom and we all know that the *last* thing you want is a soggy bottom!

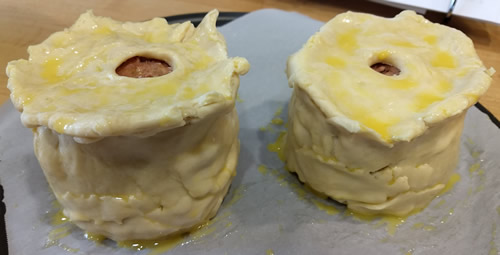
Anyway, where was I? Oh, right, building my pies. Next you stick lids on top of the pies, into which you have carefully cut holes for the steam to escape, and you crimp (HA HA HA) it into place (the laughing is because neither of us actually *measured* our lids so they didn’t fit but luckily they were too big and thus provided extra dough for the structural spackling required earlier). Pro tip – make sure you cover the plate on which you were chilling the lids with plastic wrap or else you might have to chisel it off said plate prior to placing it atop the world’s ugliest hand raised pies. Ahem.

Then into the oven they go, for roughly an hour, during which you realize that the recipe makes wayyy too much meat filling, so then you decide to use the lard (lard, lard, larrrrd!) to make *more* pastry dough. Except without the hot water because that was just nasty.

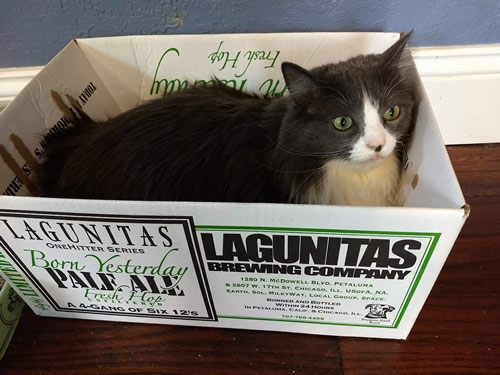
Interlude #2! Here’s a cat in a box! Said cat spent the majority of the entire baking session *whining* because I have no idea why except cats.

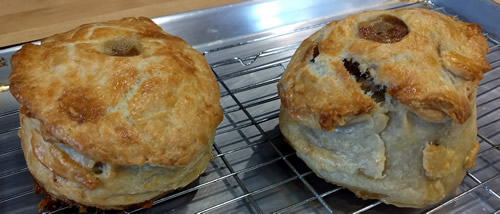
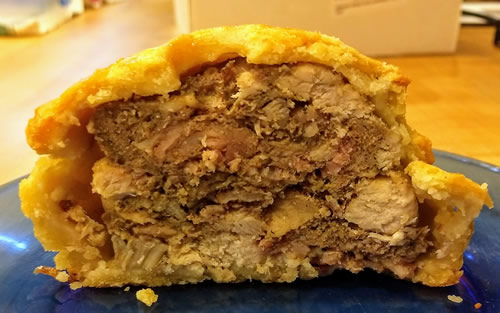
Finally the pies came out of the oven. I am pleased to report that my pies did not leak, nor did I have any significant structural failure (unlike my sister’s free-standing pie, which had a rather impressive blow-out on one side).

So. Once the pies are out of the oven, you are supposed to then pour in a mixture of broth and gelatin, which is supposed to fill in all the nooks and crannies to keep the meat moist or the pie from collapsing or something. I have no idea. All I know is that mixing broth and gelatin creates a concoction that smells absolutely *foul*. And also there was literally no room at the top of my pie in which to insert a funnel so that I could pour in the meat jello in the first place. So I didn’t end up doing that part.

And how, you may ask, did they taste?

Eh.

The filling was fine – a bit on the peppery side, but otherwise about what you’d expect if you mix sausage, bacon, and poultry together in a bowl and smash it into a pie crust. The crust is sturdy and yet still a bit flaky.

Overall, it was fun to try, although I have a feeling neither of us is going to be dashing off to work with hot water crust pastry again any time soon. And I am quite happy to report that were no soggy bottoms on either side of the webcam (Mary Berry would be so proud).

Mmm. Lard.


This time around we came up with a hashtag

Because we had so much fun making Stroopwafels, my sister and I started immediately working on what we wanted to bake next. She was in the mood to do something with yeast dough, so a flurry of possible recipes flew back and forth. Since I picked the recipe the last time, I told her she had to pick it this time, so finally she decided on these, which are yeasted buns filled with cinnamon and chocolate, and plaited into a complicated shape. Due to the fact that it’s a yeast dough, we decided we’d both make the dough and set it aside for its first proof, and then join up via Google Hangouts for the next half of the process.

Looking at the recipe, I noted that we were going to be otherwise twiddling our thumbs for an hour during the second rise, which is why we then also decided to make the Cinnamon Star from King Arthur Flour. Conveniently enough, that happens to be the current monthly bake-along from King Arthur Flour (although I hadn’t realized it at the time I suggested it), so that link actually includes lots of details and pictures of the entire process, if anyone else wants to play along.

I made both doughs last night and popped them into the fridge, but the dough for the buns didn’t work out, so this morning I hastily remade it…which is why we ended up swapping the order for what we made, since my dough needed extra time to rise.

Anyway. First up – the cinnamon star. My sister’s made that one before, and she happens to have a lot of apples so she decided to add some chopped apples to her cinnamon mixture, whereas I stuck exactly to the recipe.

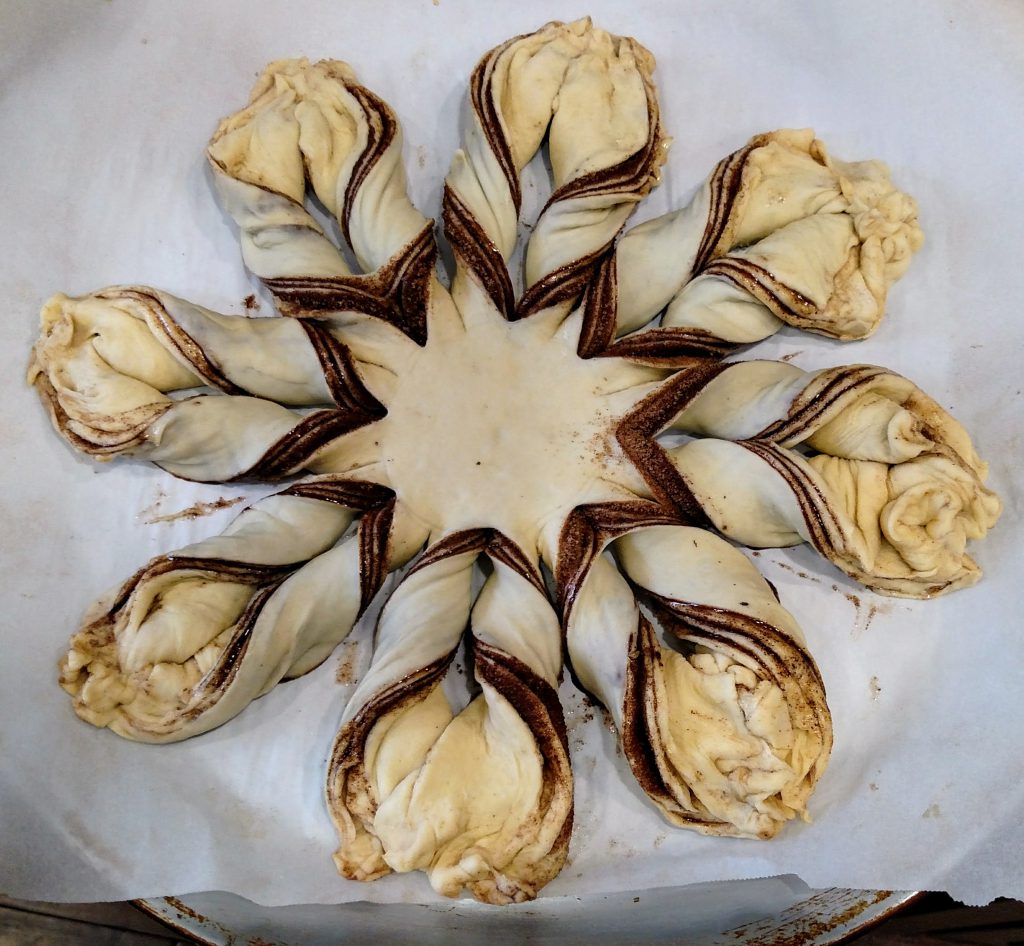
Here is my star, prior to baking.

It looks way more impressive than it has any right to be (trust me when I say this was a hot mess prior to the cutting and the twisting step).

So once we had the stars formed and resting under towels, next we tackled the buns.

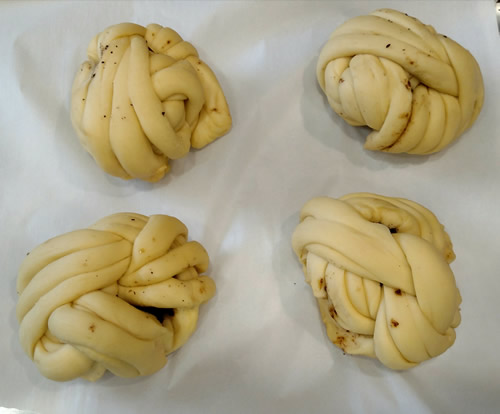
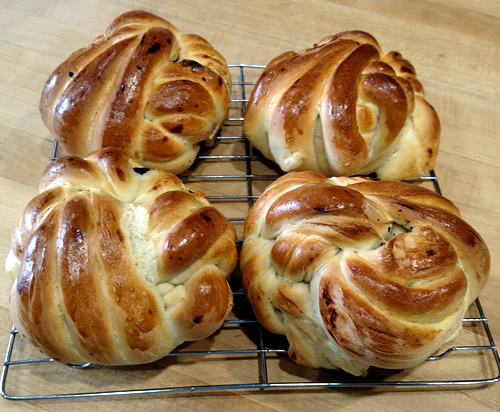
These were…a pain. The instructions are text only, so both of us were reading them aloud, trying to figure out what, exactly, we were supposed to be doing with the plaiting and the stuffing. At one point I was holding up the laptop, so that the camera was facing down at my worktop, trying to plait the dough one-handed (not very successfully) so she could see what I was doing. Suffice it to say, neither of us has a clue whether we did it correctly or not. But we got them all plaited and stuffed, in one form or another. Here they are, rising.

So once *that* was done, and all the snickering and inevitable comments about ‘playing with our buns’ were out of our system (I kid, those will *never* be out of our system!), it was time to bake the stars.

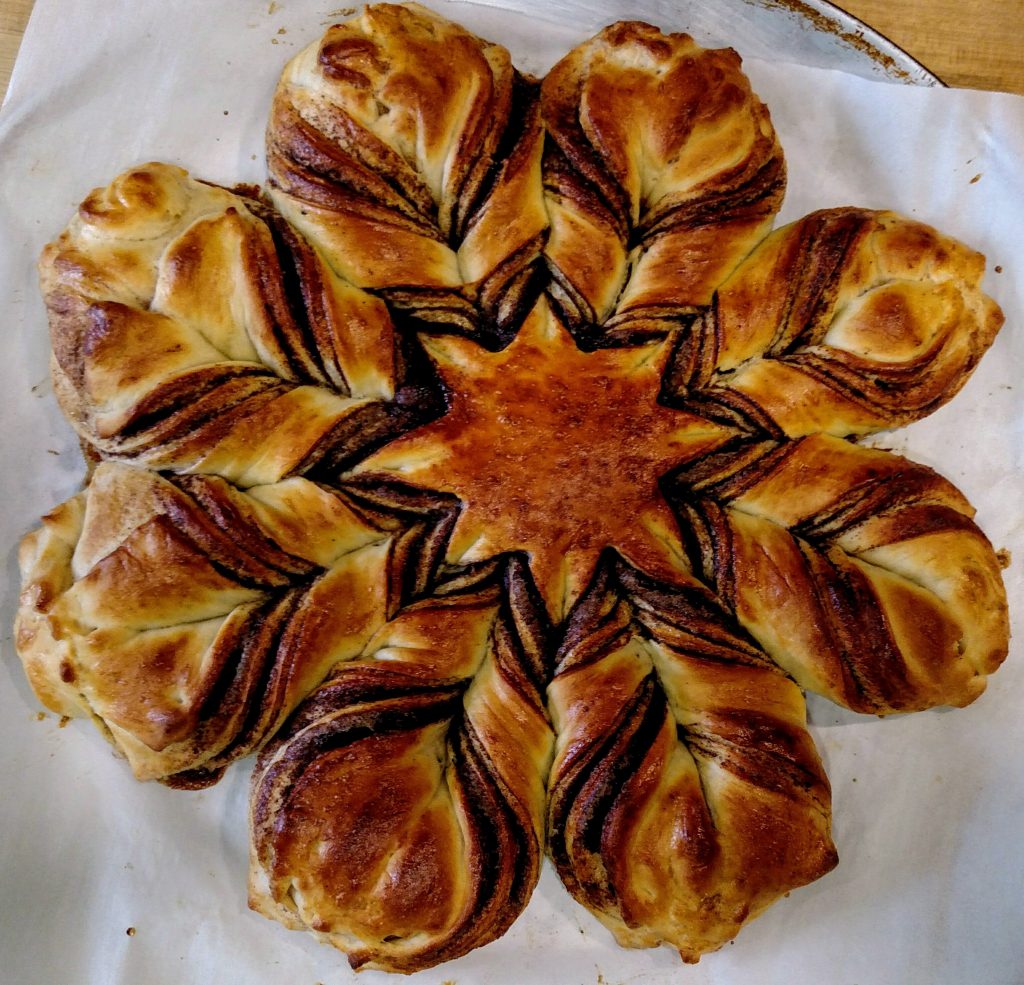
Here is my cinnamon star, after baking.

It smells as delightful as it looks, and tastes even better!

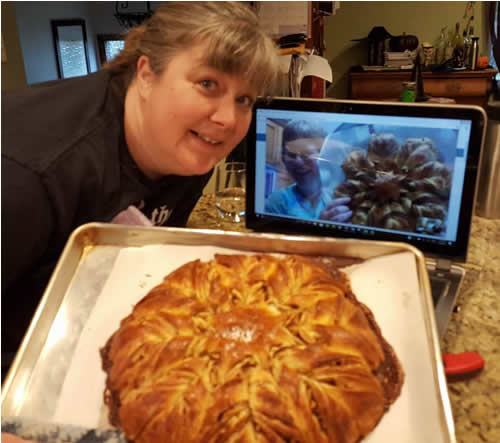
Here are my sister and I, with our respective stars.

Hers spread out a bit more due to the apples (and took a lot longer to bake because the apples made the dough a lot wetter).

Verdict from both sides of the Google Hangout – yum!

And then about 20 minutes after those came out of the oven, it was time to pop in the buns. Which then proceeded to grow to ginormous size in the oven.

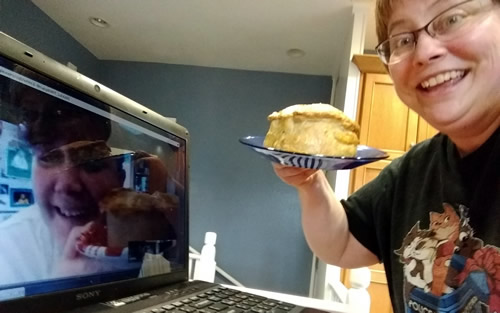
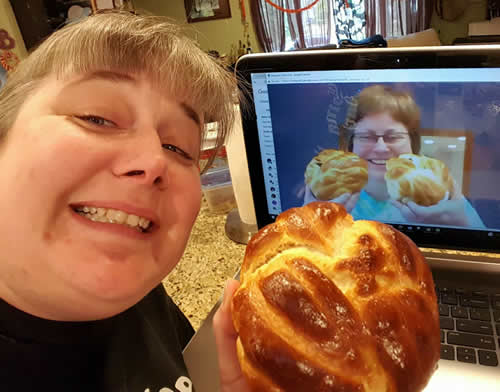
Think I’m kidding about the size? Here we are, both of us posing with buns almost as big as our faces. One of us may or may not have quoted modified lyrics to Baby’s Got Back at this point. Mayyyybe.

Naturally we allowed these to cool completely before we, oh who am I kidding, you all know darn well we cut one of those suckers open and tried it immediately.

The dough itself is quite lovely – it’s a nice light texture and has some good flavor. The filling was…eh. I suspect next time I need to try to get a lot more of the sugar mixture into there (or else don’t use as dark a chocolate as I did). Verdict – tasty, and fun to try, not something either of us will likely do again.

So overall, the second #BakingSisters day was a success.


Stroopwafel Saturday

My younger sister is a baker – not just a baking enthusiast like me, but a ‘went-through-training-and-knows-what-she’s-doing’ baker. So she’s who I contact when I have questions about why my bread is doing things it shouldn’t be doing, or what sort of cookie dough one should use when one is going to do cut-outs with patterns, and that sort of thing. She also, like me, loves to try new recipes, and on a recent trip up to Seattle to visit with her, we took advantage of the fact that we were both in the same place with access to a kitchen, and tried out a couple recipes – chocolate-filled hand pies, and homemade Tagalongs (the chocolate-covered peanut butter-filled cookies one can usually only get from Girl Scouts). It was messy and silly and tasty and a lot of fun and when I got home I got to thinking that if she and I lived closer, we’d likely be getting together on a regular basis to try out recipes and play with butter and sugar and flour.

So a week or so ago I sent my little sister this recipe and said, hey, even though we’re not in the same place, maybe we could try doing these together over Google Hangouts. She was game, so we checked our calendars, and today was the day.

The recipe itself is pretty straightforward – you mix up the dough and let it sit for a bit, and then you make the caramel (both of which smelled absolutely delightful while going together), and then you make the cookies themselves. And then the next step is to split an already-thin cookie into two even thinner pieces, while still hot (possibly there was a tiny bit of swearing and uttering of ‘ow, ow, ow!’ during that process), then dollop a generous amount of caramel in the middle and finally, smoosh the two pieces together, spreading the caramel syrup between them. Then you set those aside to cool and when they are done, you have stroopwafels!

If you happen to have a pizelle maker, which my sister does because she scored it for $10 at a garage sale years ago, then you can smash the dough in there and it will come out nice and thin with gorgeous patterning on both sides. However, if you do not have a pizelle maker (like me), you can jury-rig a dough-smashing system via the clever combination of an electric skillet and a saucepan. Put the dough on the skillet, grease the bottom of the saucepan, and then use that to smash it down into a flat thing. Pro tip – a regular waffle iron doesn’t work (I tried) – the divots are too deep and your dough won’t smash thin enough.

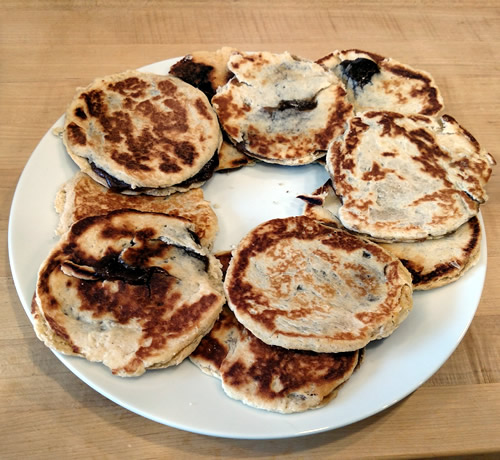
Here are my finished stroopwafels. I know they look a lot like lopsided pancakes (see above re. ‘don’t have a pizelle maker’), but trust me, they’re actual cookies, with delicious brown sugar maple caramel syrup in the middle, and they are quite, quite yummy.

The end result of the whole thing is that we both had a lot of fun, laughing and chatting over the video call, showing each other our dough and our cookies and our caramel, and we have decided we are going to try to do this on regular basis. Because after all, we live in the future now, with webcams and laptops that can be propped up in the kitchen, and living two states away from each other should not be the deterrent to doing something we both love to do, together.


top