Still Life, With Cats

This content shows Simple View

Baking

Light as air

A couple weeks ago a friend came over for some kitten therapy, and brought me this, which she’d found when clearing out a family member’s things. She knew I liked baking, so thought I’d appreciate it.
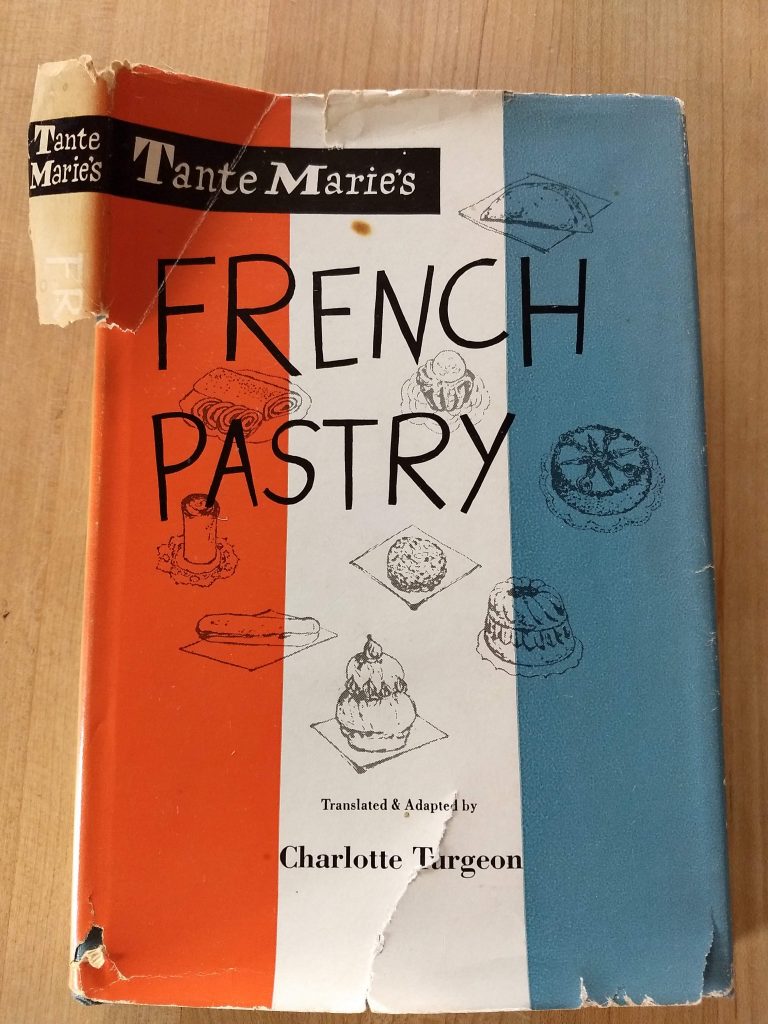
It’s a wonderful little book, published in 1954, and I had a lovely time thumbing through it that night. There’s quite a few recipes I’m going to have to make out of this book, but one in particular I bookmarked specifically for this month: Lemon Meringue Lady Fingers. Because after making creme brulee and ending up with a lot of egg whites, the best way to use them up is to turn them into meringues!

The book provides a recipe for basic vanilla meringue cookies, as follows:

Ingredients:

  • 1 cup sugar
  • 1/3 cup water
  • 4 egg whites
  • 1 teaspoon vanilla extract

Preheat the oven to 275 degrees F.

Boil the sugar and water to 250 degrees F, or until it forms a soft ball when a little is dropped into cold water. Beat the egg whites very stiff. Beating continuously, add the syrup very slowly; when all the syrup is used, add the vanilla. Fold in the confectioner’s sugar.

Butter a baking sheet and dust it with flour. Spoon the dough in strips 3 1/2 inches long and 3/4 inch wide or, better still, force the batter through a pastry bag fitted with a small plain tube. Bake 20 to 30 minutes and keep the oven door slightly ajar with a wedge of paper.

After that, there’s several different varieties (chocolate, orange, coffee, and lemon), with directions for how to modify the original recipe. For the lemon variety, you substitute 1 tablespoon lemon juice for the vanilla extract, and you stir in 1 teaspoon lemon zest when folding in the confectioner’s sugar.

I didn’t feel like fussing around with trying to make perfectly shaped logs of dough, so instead I used my largest star tip and a pastry bag and piped out individual cookies that way.
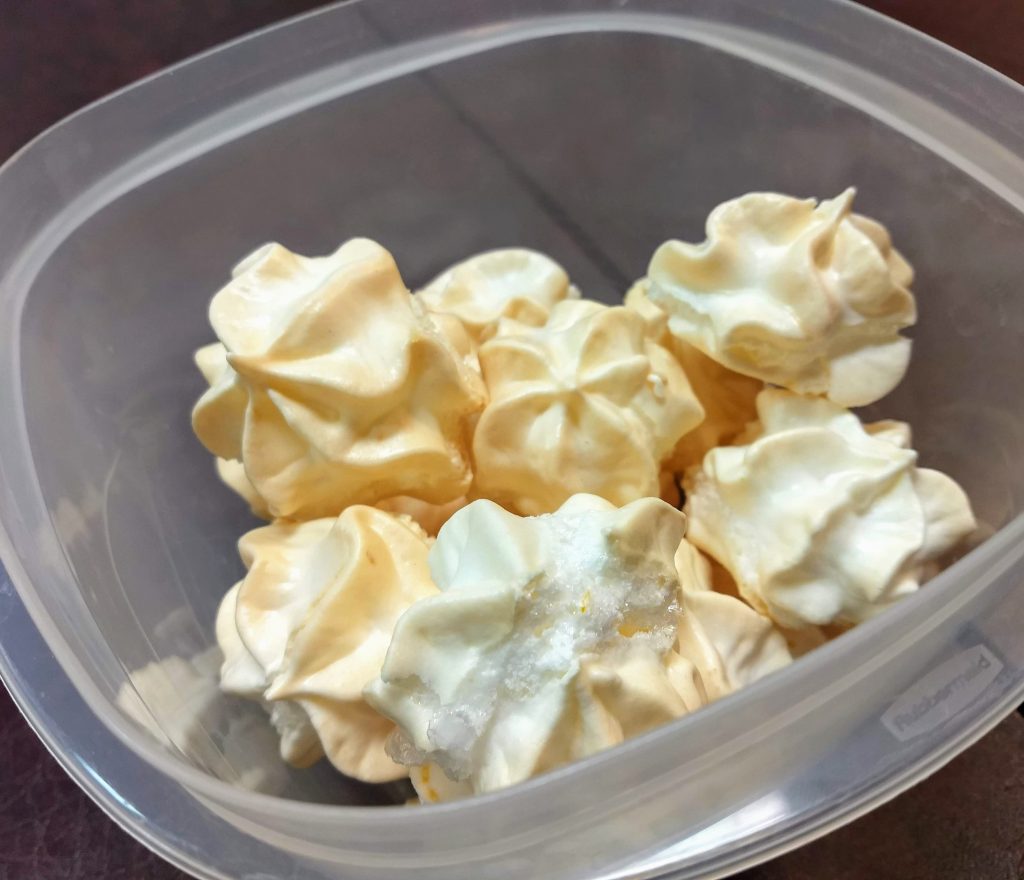
I thought they were rather tasty – nice and crunchy on the outside with a chewy middle and a delicate lemon flavor – but everyone else I offered them to went crazy over them, so clearly this recipe is a keeper. I am definitely going to have to try some of the other variations at some point – the coffee one intrigues me.

Here is where I now admit that I actually made these yesterday, because what with carting kittens to and from the vet to get fixed, work, and rehearsal in the evening, I knew I wasn’t going to have any free time to bake. So take it from all the members of the local Lacy Knitters Guild chapter, as well as the members of Vox Musica – these are worth giving a try.

Lemons used: 1
Total lemons this month: 17

Making a lemon thing a day for Thingadailies.


Another type of curd

This is a two-day post because yesterday was super busy, what with the decorating class in the morning and then a full afternoon of gaming. Plus there isn’t all that much exciting to say about yesterday’s lemon thing, except for its application to today’s.

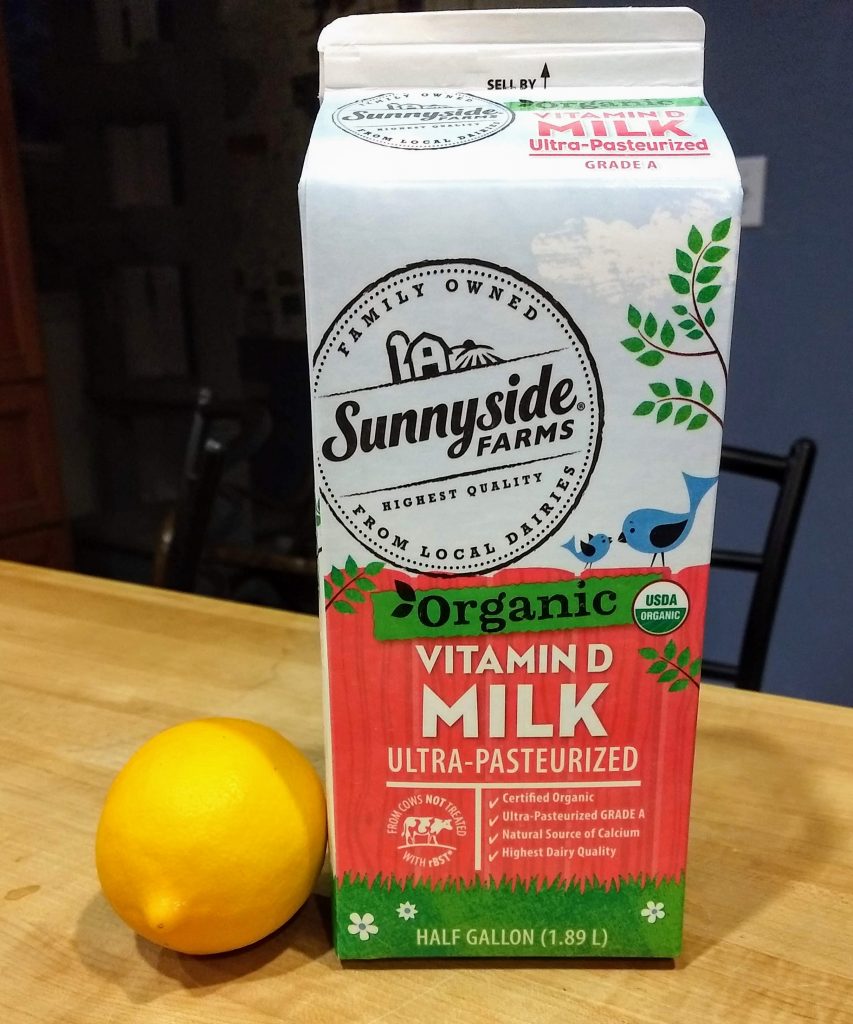
Anyway. Yesterday I took these two ingredients.

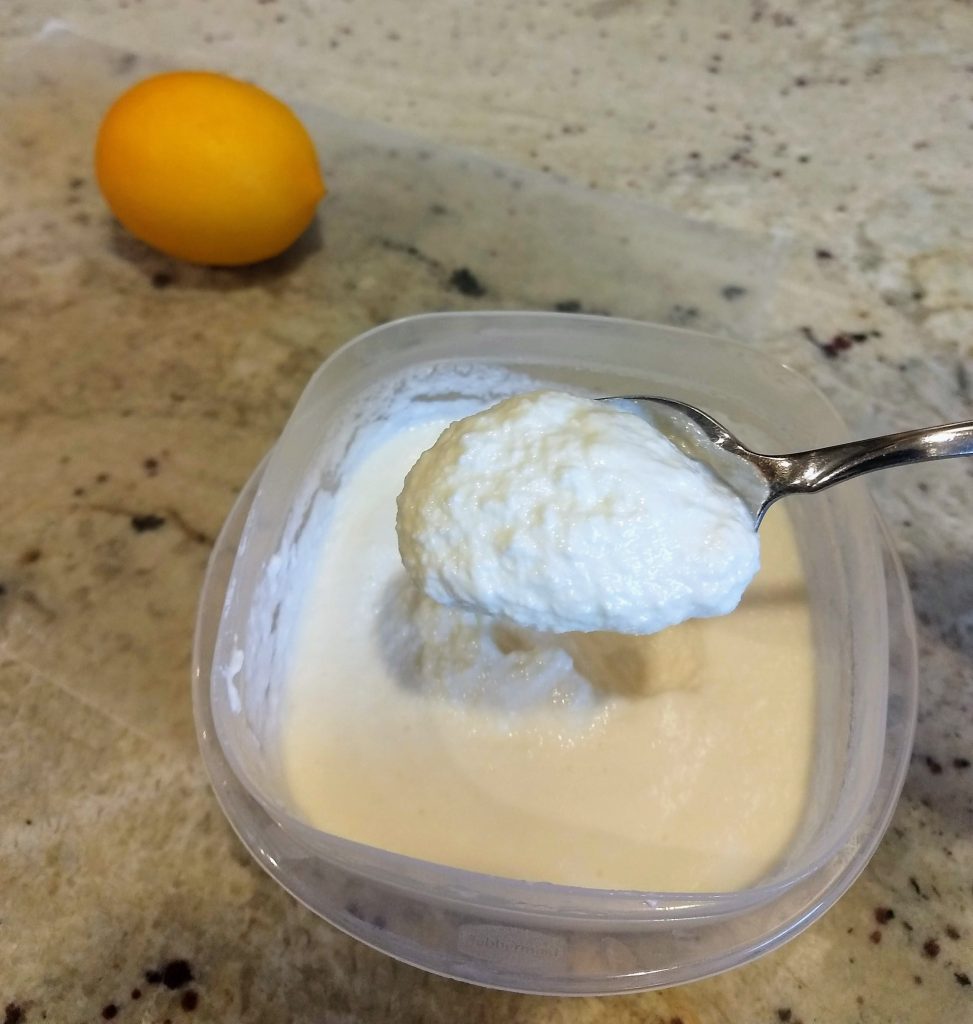
And I turned them into this.

Yup, that’s right. I made cheese. Lemon cheese, to be exact. When trawling the internets for ideas for this month I came across this recipe and thought, eh, why not give it a try. So yesterday morning I got up, poured myself some coffee, and then heated up a half gallon of milk to about 180 degrees F. Then I juiced a lemon and stirred that into the milk. Roughly 15 minutes later, I poured the resulting mess into a cheesecloth-lined colander. I jury-rigged up a cheese draining system involving an empty pitcher, some heavy glass jars, and the kitchen faucet, and let that sit for an hour or so while I did my usual morning chores, and when it was all done, I had cheese. Or some loose approximation thereof.

Trust me when I say this sounds more exciting than it actually was. The cheese itself has practically no flavor at all, although the container does smell faintly of lemon after a day in the fridge.

But once one has cheese, one needs to use it in baking things, so since I happened to have a sheet of puff pastry in the freezer that needed using up, I decided to turn the cheese into these Lemon Puff Pastry Packets.

They’re pretty simple to throw together. You just mix up the filling, roll out and cut the puff pastry into something vaguely resembling squares, egg wash them, fill them, fold and crimp the edges, toss them into the fridge to chill for half an hour, and then after another egg wash and a sprinkling of sugar on top, pop them into the oven. A short time later, you get these.

The result was…passable. There’s a very faint lemon flavor but only due to the zest and juice added to the filling, and not due to the cheese itself. We both agreed they were lacking *something*.

In the meantime there’s yet more bland lemon cheese in the fridge to use up, so expect it to show up in a couple more recipes this month. And I think it’s safe to say I won’t be bothering to make either of these recipes again.

Lemons used: 2

Total lemons this month: 16 (still so many in the fridge. SO. VERY. MANY.)

Making a lemon thing a day for Thingadailies.


Morning sun

This morning I got up, poured myself some coffee, and immediately got to work making lemon scones.

I have made scones a bazillion times in the past, because they’re one of those stupid-easy (as long as you keep the butter cold and don’t overwork the dough) breakfast foods that everyone loves. However, I hadn’t ever tried making lemon ones because most of the lemon scones I have tried in the past have been far too lemony – unpleasantly so. But this month is all about the lemon, so I figured I might as well give it a go.

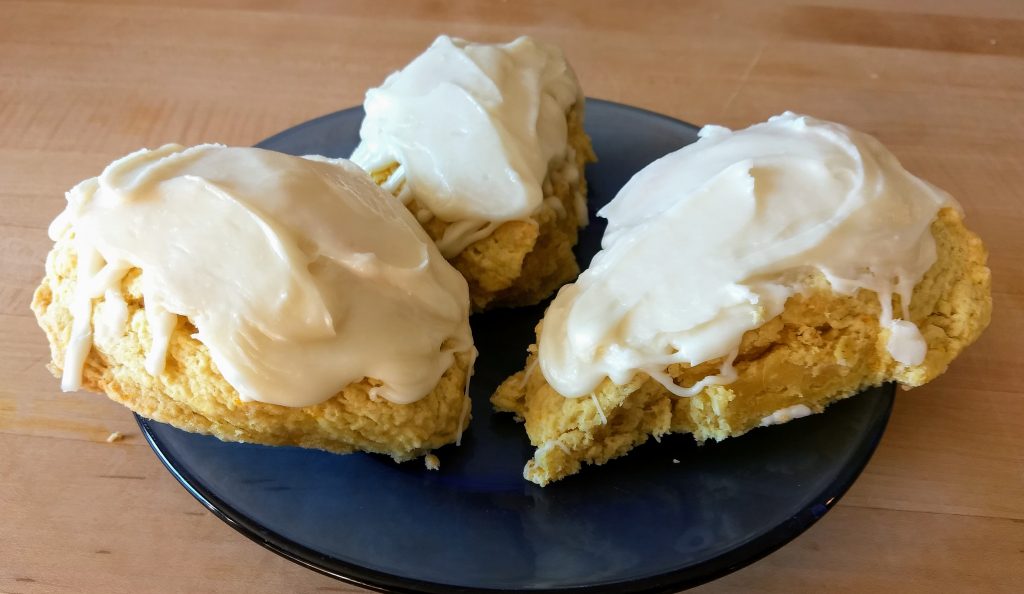
The scones are mixed and then shaped and baked, and then you let them cool for about 15 minutes before you top them with a thick lemon glaze.

Fifteen minutes, by the way, is plenty of time to go hang out with tiny three week old foster kittens.

This recipe uses a lot of lemon – nearly six tablespoons of juice (including what’s in the lemon glaze on top), and several teaspoons of zest, but yet weirdly it wasn’t very lemony at all (and most of what’s there is from the glaze on top and not the scones itself). I don’t know if maybe the lemon flavor will become more pronounced as they sit, or if it’s because I used Meyer lemons instead of regular ones, but I was quite relieved. I would definitely make these again (although perhaps I might cut them into smaller pieces next time).

Lemons used: 3

Total lemons this month: 8

Making a lemon thing a day for Thingadailies.



The only snow we’ll see

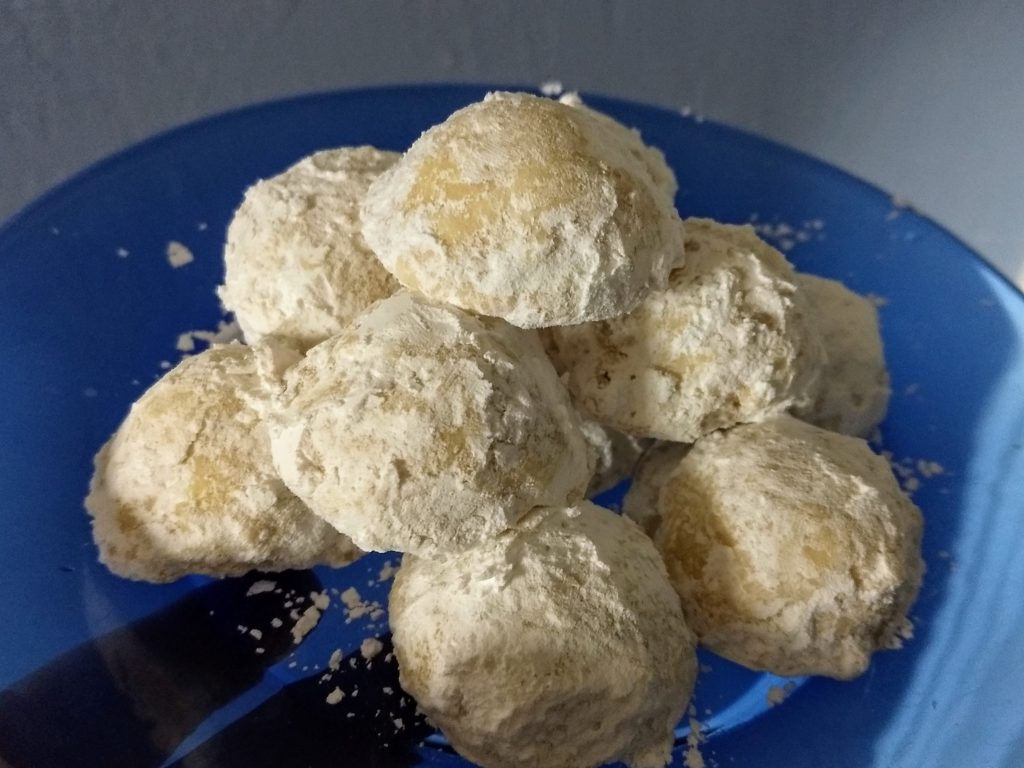
Tonight is a rehearsal night, which means I didn’t have much time to make anything complicated, so I made Lemon Snowball Cookies.

I stumbled across this recipe a few weeks ago, in King Arthur Flour’s social media feed, and have been looking forward to trying them ever since. They have some similarities to Mexican Wedding Cakes, but these don’t have crushed nuts. They go together pretty quickly – just cream the butter and zest a lemon, and add in powdered sugar and a couple of other ingredients. Once out of the oven, they cool for a few minutes, and then get rolled in powdered sugar.

The recipe calls for the addition of lemon powder to the powdered sugar coating, but I don’t have any, or know what it is, and since the primary goal is to use up actual lemons, not lemon substitutes, I just ignored that bit.

They are delicate, and a little bit crumbly, and there’s a light lemon flavor that gives just a hint of brightness without being overwhelming. Over all, they are a perfectly acceptable cookie. Will I make them again though? Eh, probably not.

Lemons used: 1

Total lemons used: 6

Making a lemon thing a day for Thingadailies.


Crisp

Hooray, it’s December 1st, which means it’s time once again for me to make an effort to post daily for an entire month, for Holidailies. How convenient I have a whole bunch of stuff stored up to talk about because I have been ever so lax in updating this thing (oops).

But instead of updating on all the stuff that’s been going on the last couple months, instead I’m just going to talk about baking. Because this morning, on a whim, I decided that I really needed to spend several hours tied to the kitchen, and so along with several other things, I made croissants, from scratch.

I’ve worked with laminated dough before – you have to follow the directions and not chill the butter too much, or let the dough or butter get too warm – but the primary reason why this isn’t something one does on a regular basis is just time. The actual hands-on time isn’t all that much, but you have to pay attention to the clock, because with the folding and the rolling and the resting, the whole process took about four hours from start to finish.

I used the King Arthur Flour recipe because they’ve never steered me wrong yet when it comes to baking, and this time was no different. An interesting twist in this recipe I haven’t seen in other laminated dough recipes is that you mix the butter up with a little flour, which keeps it a little bit more pliable for the lamination process.

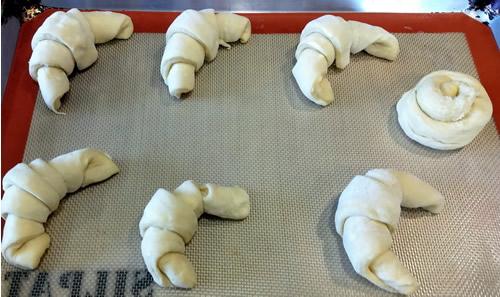
The recipe makes two dozen croissants. I stashed half the dough in the freezer for later, uncut. The remaining dozen I rolled, but stashed half of *those* into the freezer for later, leaving six croissants, plus the scraps from the edges that I just spiraled into a little bun.

When they baked, a couple lost their ‘curl’, and also I forgot to eggwash the tops, but no matter, they still browned up nicely.

Clearly my croissant shaping skills need some work, but they turned out *quite* delicious. The top layers crumbled messily, as a good croissant should, and when I cut one open I was quite excited to see lots and lots of layers, which is exactly what one should see. They are smaller than the ones you might find at your local (good) bakery, so the leftovers made the perfect accompaniment to the soup we had for dinner. Yum.

‘Tis the season for Holidailies.


Fit for kings

Many, many years ago, when my older sister and her husband were first married, my brother-in-law was accepted for a year’s study at the Von Karman Institute of Fluid Dynamics in Belgium. This was a huge opportunity for him, so since they were still young and unencumbered, they packed up all their stuff and stashed it in a storage shed in my parents’ back yard, found a friend to live in their apartment and take care of the cats, and headed off to Belgium.

My parents and my younger sister and I flew out to visit them, because how could we not? It was a wonderful trip – wandering around all these amazing, historic sites, wandering through buildings that were older than my own country and trying to soak in as much as we could in just a few days. The trip spoiled me completely for chocolate, because there is no comparing the chocolate over there with the waxy, too-sweet stuff I could get back home (although in the decades since, that has thankfully been slowly changing), and for bread (there is no comparing the tasteless packaged loaves sold in major grocery stores with what you can get from the tiny bakeries that were everywhere). And of course, there were the waffles.

When you think waffles in the US, you think of breakfast food. But in Belgium, they were snack food, and there were little street cart vendors everywhere, selling sticky-sweet waffles wrapped in grease paper. They were at once crunchy and chewy and absolutely divine.

On returning to the US, we started noticing some restaurants advertising that they offered Belgian waffles. Alas, much to our disappointment, these were not what we had had in Belgium. These, instead, were soft, floppy things with extra-deep pockets, but otherwise made of the same dough as any other ordinary breakfast waffle. My understanding is that ‘Belgian’ is the brand name of the original waffle iron with those deep pockets, and had nothing whatsoever to do with the country.

Decades later, the internets tell me that we were not the only ones who were let down by waffles of a similar name. What we didn’t know at the time, but since have learned, is that the things we had in Belgium are actually known as liege waffles. Not that it would have helped us much, since liege waffles are, alas, not a ‘thing’ in the US, but at least knowing the name pointed us in the direction of recipes to try to make them ourselves for this month’s #BakingSisters project.

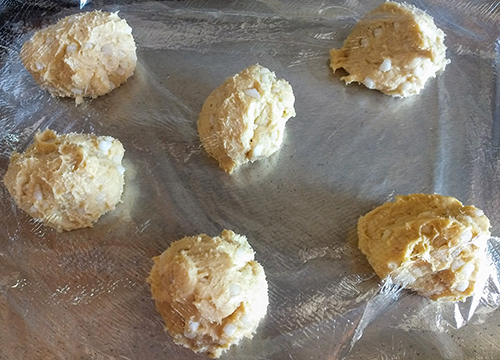
There are a lot of recipes out there, but we used this one. This is a yeasted dough, and the recipe linked above had all sorts of extra steps, which meant that in order to actually cook waffles on our #BakingSisters day, we had to do a whole lot of prep work the day before.

First, you mix up a sponge of flour and water and yeast and let that sit for an hour, and then you mix in all the rest of the ingredients, including a whopping 11 tablespoons (no I am not kdding) of butter. That creates a lovely soft and silky dough that sits for four hours to rise, and then then goes into the fridge to rest overnight.

The next morning, the dough comes out of the fridge, and then – here’s where it got messy – you take this very soft and sticky dough and you knead in pearl sugar. In some recipes you could probably swap sugar types with ease, but here, you really have to have the pearl sugar, because that’s what gives liege waffles their signature texture and flavor.

After the pearl sugar is all kneaded in, next you divide the batter into six pieces and let it sit for another 90 minutes.

And then, finally, you are ready to cook them.

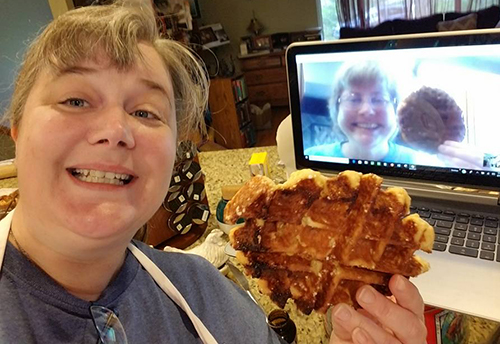
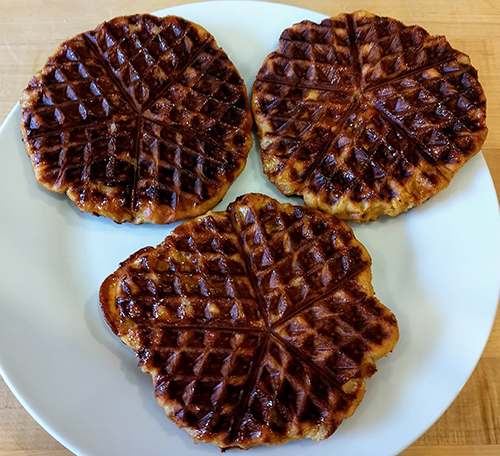
It took a couple waffles to get the hang of how best to cook them. My sister did hers in a Belgian iron (the kind with the deep pockets) but I just used a regular waffle iron. The first one or two were a bit misshapen and it was hard to tell quite how long to cook them (the recipe says 2 to 4 minutes). I started using the bottom of a pan to help press the top of the waffle iron down on the last few, in order to spread the dough out more uniformly, and that seemed to help.

So were they everything we remembered, lo those many years ago?

Yes, I think so. A couple of mine got a little overdone, but they were still a good representation of what we remembered. The pearl sugar melts and creates these little pockets of caramel goodness on the outside of the waffle. It’s not something I’m likely to make again, or at least not for a very long time (since it’s time consuming and messy) but it was fun to take the first bite, and to reminisce about a trip, so many years ago.


Knot worth it

What’s that, you say, you’ve been missing all my rambles on baking since the end of this year’s Thingadailies? Don’t worry, I’ve got you covered. Yes, that’s right, it’s time for another #BakingSisters bake!

This weekend my parents were up in Seattle in order to visit with my sister and also see my niece play a mermaid in her last high school play (because somehow she is now a senior, even though I can’t figure out how that happened because the rest of us certainly haven’t aged that much since she was born, right? Oh, wait….

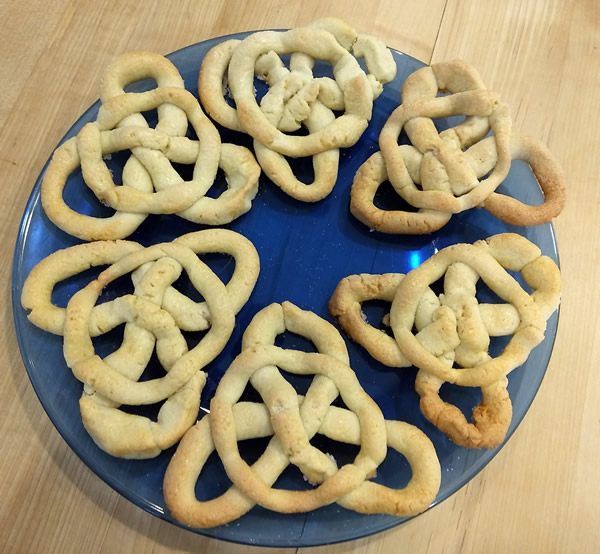
Anyway, because they were visiting and because things were going to be busy with the play, this month we decided to do cookies – specifically Tudor Jumbles. These were a recent Technical Challenge recipe on the Great British Bake Off, should the name sound familiar.

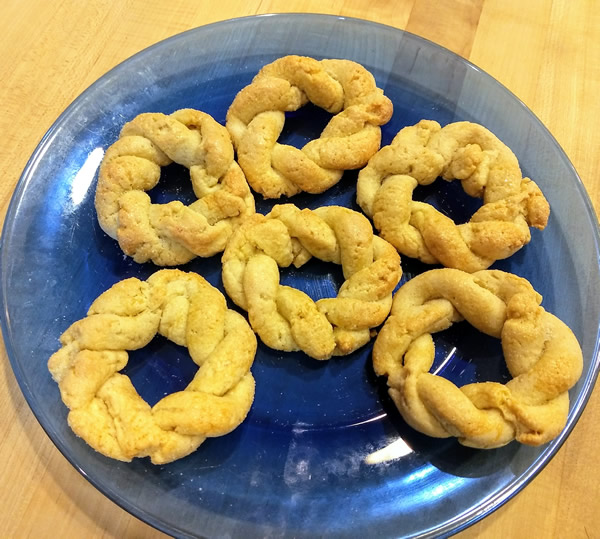
The dough itself is pretty basic – flour, sugar, butter, some flavorings, and an egg. Where it gets complicated is with the shaping, because you can’t just plop a lump of dough onto a sheet pan and call it done. No, these had to be carefully knotted into complicated shapes, then brushed with egg wash and sprinkled with sugar before baking.

My sister (with my mom joining in) made the dough in that recipe above. I, however, do not like either caraway seeds or anise (licorice) flavoring, so I went a bit off script. I made two half-batches of dough – one with ginger, and one with some almond flour (primarily because I had some that needed using up) and almond extract.

The first shape is a circular knot. The dough I flavored with ginger was really, really dry and it was actually pretty hard to ‘knot’ the rope of dough without it cracking into a million little pieces.

The second shape is a triangle ‘knot’. I know that technically I should have figure out a way to do it all with one single continuous rope of dough, but this one was a nightmare to shape to begin with (the almond dough was a lot softer than the ginger dough, to the point where I actually ended up kneading in a whole lot more flour prior to shaping, just so it would be firm enough to work with), and any attempts to weave the circle through the triangle points just ended up with broken dough and a lot of under-the-breath swearing.

Shaping these cookies was not a quick process, and it seems rather anticlimactic that for all that work, you only end up with 12 cookies in total. They’re also *big* cookies – each one is a couple inches across.

Verdict: Eh. The flavor’s not bad, but it certainly wasn’t worth all the effort of making the knots for just an okay cookie. My sister did comment that it might be fun to try the knots again with a different type of dough – perhaps a gingerbread – that had a little more pliability, and a lot more flavor. So we’ll see – maybe come Christmas time I’ll feel the urge to wrap dough into stupid little knots again. Or maybe….not.


Light as air

Do you know what today is? It is February 28th! That means it’s the last day of Thingadailies.

We started the month with chocolate, in the form of baked Alaska, so I suppose it’s only fitting that we end the month with chocolate as well. Conveniently, today is National Chocolate Souffle Day. I hope you all pulled out the whisks and celebrated appropriately.

Souffle is one of those fussy sort of recipes that I’ve tried in the past (in both sweet and savory forms) with varying levels of success. If you’re not careful, you end up with something that tastes overly eggy, or lumpy with bits of cooked egg. It’s also not a food that I get excited about in general, so it’s not like I’ve spent much time trying to perfect it. Nevertheless, I figured I’d give it a shot. Considering that chocolate souffles were a Technical Challenge on one season of Great British Bake-off, I went into this with a bit of trepidation.

I used this recipe. It calls for two six-ounce souffle dishes but we’re not that fancy around here, so I used two tiny little Pyrex bowls that are 5 ounces each, and hoped for the best.

It’s a recipe with several fiddly steps – melting chocolate and then stirring in butter, whipping egg whites, and then carefully combining the two mixtures together in such a way that you minimize the loss of any volume you just whipped into the egg whites. The dishes are buttered and then sugared, and then filled to the brim, and then they get stuck into the oven on the lowest rack for fifteen minutes.

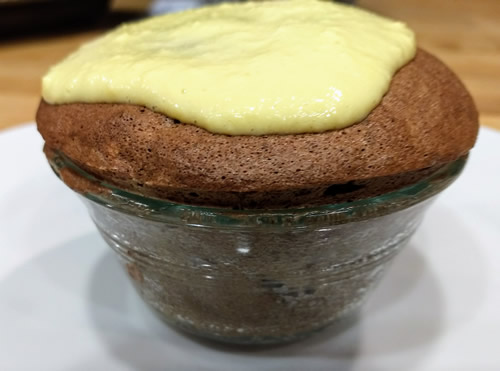
We kept careful watch on the oven as the souffles cooked and both of us gave a little cheer when it started to puff up over the sides of the bowl. When the timer went off I pulled them out, and then hurriedly poured the creme anglais over the top so I could take a picture.

It’s not very impressive-looking, I know, but it turned out really, really well. Shockingly, I managed to make two perfect little souffles. The inside was smooth and literally just melted in the mouth, with no little bits of egg, or graininess from the chocolate. I even managed to do justice to the creme anglaise, which was smooth and sweet and a nice accompaniment to the chocolate.

Definitely nice to end this year’s Thingadailies on a high note.


A satisfying crunch

Today is Tortilla Chip Day. Obviously the quickest way to make tortilla chips is to go buy some tortillas, cut them into wedges, and cook them. But you all know me well enough by now to know that that just wasn’t going to cut it – at least not on a weekend day when I actually have time to do more.

So first thing this morning, when I got up, I made some tortillas. I know that technically tortillas are either flour *or* corn, and this recipe combines them, but it sounded interesting, so I figured why not.

You mix up the dough and then divide it into 10 balls and let them sit for half an hour to rest. This gives the cornmeal time to soak up some of the moisture.

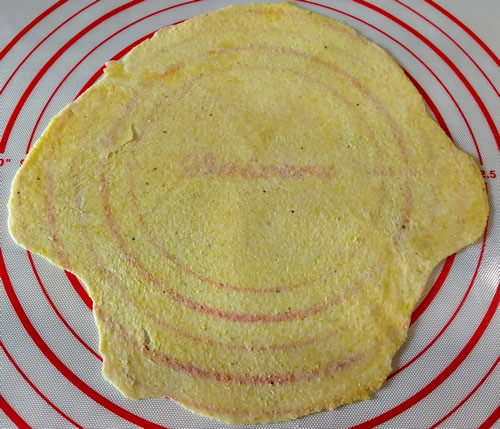
Then you roll each little ball into a roughly 8 inch circle. My circle-rolling skills are not fantastic, but I did my best to get them reasonably well shaped.

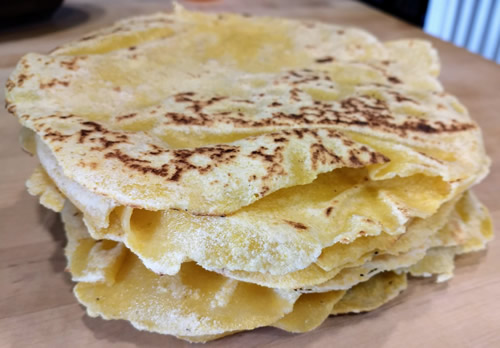
They are, by the way, rolled *extremely* thin, as you can see.

Next you cook them in a hot, ungreased frying pan for about 45 seconds per side. Of course, then while putting them into the pan, they had a tendency to wrinkle up, and lose their shape, so my inability to roll things into a perfect circle didn’t really have much bearing in the grand scheme of things anyway.

A pile of finished tortillas.

These aren’t a flexible tortilla (I’ve made flour tortillas before, which turned out soft and pliable); they’re more a bit stiff and slightly rubbery. I suspect if I’d cooked them a little less per side they’d still have been soft, but that’s okay, because soft isn’t the ultimate goal for today.

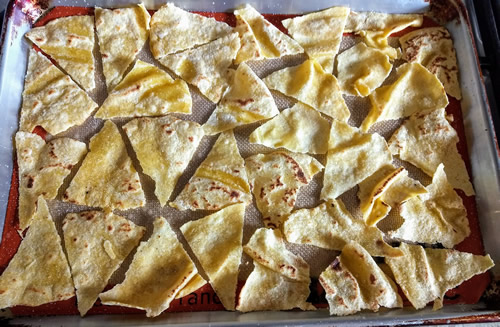
Once the tortillas were all done, the next step was to turn them into chips. I cut each into 8 wedges, then spread those out on a baking sheet, gave them a quick spritz with some nonstick spray, and a liberal shake of salt, and tossed those into the oven to bake until crispy.

And what better way to enjoy my slightly lopsided homemade tortilla chips, than with some nachos! We pulled a bag of pulled pork out of the freezer and topped it with some cheese and salsa and sour cream, and then dug in.

Verdict: These were absolutely delightful. They’re a bit more fragile than the ones you buy at the store, possibly because they’re baked and not fried. The chips were crispy, but still had that slight grit that you expect from a corn tortilla chip, while crumbling nicely in the mouth.

Would I make them again? Maybe. It’s a bit of work to do all the steps, and we don’t actually eat chips all that often, but I’m not ruling this out, next time I have a couple hours to spare and we have the urge for something with a bit of crunch.

Making a thing a day for Thingadailies.


Not fur me

Today is National Dog Biscuit Appreciation Day. I’m not entirely sure why we’re supposed to appreciate them, but whatever, I’m just here for the baking of weird things.

Since I don’t have dogs, but I *do* have cats, I decided to fudge it a bit and instead of making dog biscuits, I made cat treats instead.

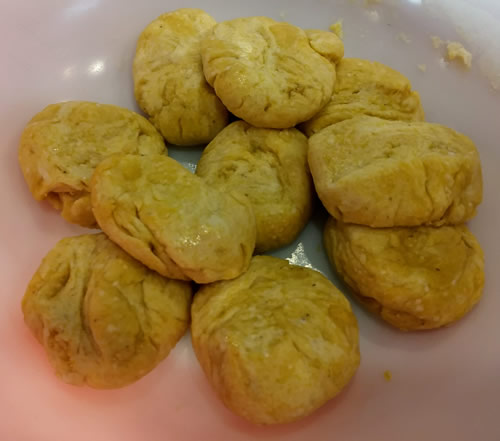
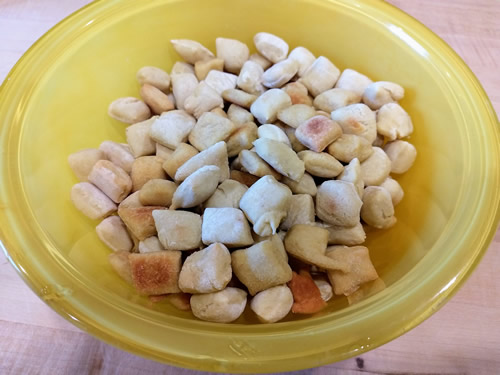
There’s lots of recipes online for how to make treats for your particular variety of furry companion, but I used this one. The ingredients list is short – a can of tuna, an egg, some flour, and for some bizarre reason, parsley (I skipped that one). You whisk it all together in a food processor or a blender, then roll it out, cut it into tiny little shapes, and bake them.

Richard provided assistance for this one, in the form of distracting the cats, first with the juice from the can of tuna as it was drained, and then while I was rolling out the dough, in case any of the cats came over to investigate. Luckily the cats were sated enough with the tuna juice to leave me and my dough alone.

One recipe makes a *lot* of tiny little treats, by the way. A *lot*.

Some of the cats were interested, at first.

From left to right, Sherman, Azzie, Rupert.

But Azzie was the only one who actually ate the treat and yelled for more. Nutmeg, naturally, wasn’t interested because in her eyes, anything that isn’t kibble is Not Food (weird cat). Sherman and Ruby just nibbled on theirs and then left the slightly gummy mess on the floor and looked at me as if to say ‘why should we care?’ Ingrid sniffed it and then gave the cat equivalent of a shrug and walked away, while Rupert ate one but slowly, and without much enthusiasm.

The recipe didn’t call for the size of tuna can, and I wonder if I was supposed to use the larger one, and not the smaller one, because I had to add a bunch more flour to make the dough stiff enough to roll. Richard and I tried them (because why not?) and they’re kind of….bland. Sort of like a cracker with the barest hint of tuna flavor, and not much else.

Ah well. The cats will just have to settle for all the other treats in the house. Poor neglected things.

Making a thing a day for Thingadailies.


top