Still Life, With Cats

This content shows Simple View

Kitchen Adventures

Light as air

Oh that’s right, I have this here blog I keep forgetting to update. There’s been a lot going on the last several months, and I will get to it all eventually – likely as blog fodder for the annual December post blitz that is Holidailies, but for now, let’s just talk about meringues.

October’s theme for #BakingSisters was meringues, although technically it ought to have been ‘playing with egg whites’ since of two things we made, one of them wasn’t actually a meringue at all, but whatever, the point is, this month’s baking session / video chat was filled with a lot of ‘I’m going to mute because this stuff has to be whipped at top speed for a long while and we won’t be able to chat over it anyway’.

We’ve done things involving meringue before, of course – there’s oodles of ways to use them (this absolutely amazing multi-layered cake that I still can’t pronounce had a layer of soft, chewy meringue, and this one had a layer of meringue mixed with crushed peanuts), but this time we decided to make meringue the primary focus.

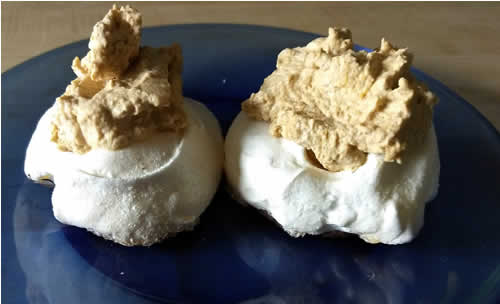
My sister made meringue bones, which she used to create a Graveyard Cake, but since Richard and I were going to be heading down to the in-laws’ house for a very early Thanksgiving dinner later that day, I decided to go with something a bit more suited to that, so I made chocolate-bottomed pavlovas with pumpkin chiffon.

Here’s where I note (likely again, since I’d be shocked if I hadn’t said this before at *some* point on this blog) that while I like pumpkin in things like bread or scones, and I adore the combination of the ‘pumpkin pie’ spices, I cannot stand pumpkin pie itself – the texture of the filling is just (to me) absolutely revolting. So I am always keen to find some other pumpkin-type dessert that might fulfill that pumpkin pie need, yet not gross me out.

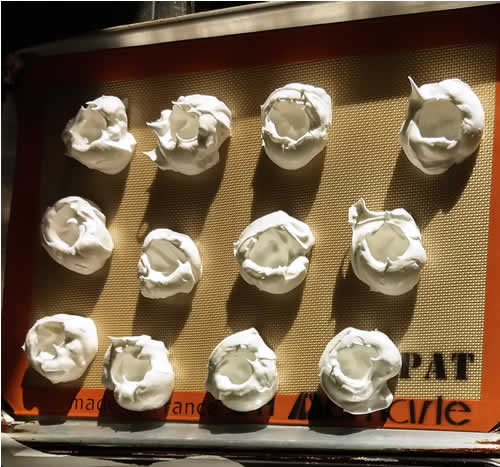
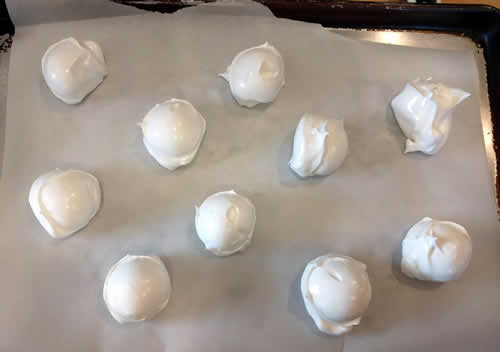
The recipe, while time consuming, because that is the way of meringue, was actually pretty easy. First you whip up your egg whites with some sugar and a little vinegar to help stabilize them, and then you scoop them out onto a cookie sheet. The recipe said to make 8 pavlovas, but I decided to make smaller ones, so I ended up with twice that.

Then with the back of a spoon you create a little cup inside each, since you need a place for the filling to sit.

And then those go into the oven for an hour on very low heat to bake, plus after they’re done baking, you leave them in the oven and turn it off and give them another half hour to cool.

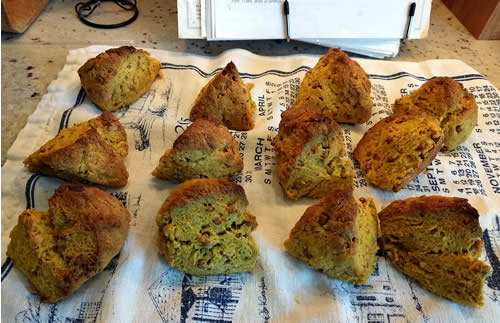
This gave us plenty of time to do other things while waiting for the meringues to bake. I whipped up the pumpkin chiffon, which is nothing more than some pureed pumpkin with spices, folded into whipped cream, and I also made a batch of these scones to use up the rest of the pumpkin, and all the egg yolks left over from making the meringue, because one should never waste the remains of a can of perfectly good pumpkin puree, and what else was I going to do with those yolks? I added 1 cup of cinnamon chips and 1 cup of finely chopped crystallized ginger to the mix, because I crystallized a pound of ginger a while back (it’s shockingly easy to do as long as you’ve got an hour or so to babysit a pot of caramel and minced ginger root), and have been eagerly finding ways to use it up ever since.

While I was doing the scones, my sister was making the cake part of her graveyard cake. And then since we still had time on our hands while waiting for the meringues, we also made marshmallow fluff.

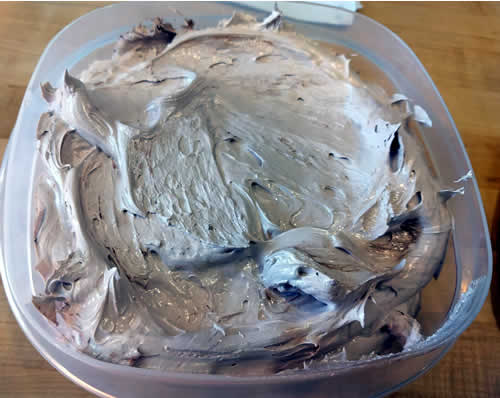
For these, you need a candy thermometer because, since you’re not baking the egg whites, you need some way to cook them, so you use extremely hot sugar syrup instead. You have to bring your syrup to exactly the right temperature first, without letting it burn, meanwhile whipping up a bunch of egg whites into soft peaks. Then, when the syrup reaches the right temperature you slowly pour it into the bowl while still whipping the egg whites, and then it’s just a waiting game as you keep on whipping the whole concoction until the resulting mix is smooth and glossy and looks exactly like marshmallow goo. This takes longer than you think it might, but you just have to be patient.

I was originally going to make just plain fluff, but as I was sitting there, waiting for the stuff to finish mixing, I idly glanced at the bottom of the recipe, where it had some suggestions for ways to flavor your fluff, and I thought wait, what? Flavored marshmallow fluff? This is brilliant! So right near the end of the final whipping stage, I added in half a cup of cocoa powder, and voila, chocolate marshmallow fluff was born.

It is delightful when consumed just off a spoon, but if you have ever had fluffernut sandwiches (peanut butter and marshmallow fluff together), I am here to tell you that fluffernut sandwiches made with *chocolate* marshmallow fluff are even better. And if you make them on thinly sliced homemade whole wheat bread, you can pretend that it’s almost healthy (cough cough).

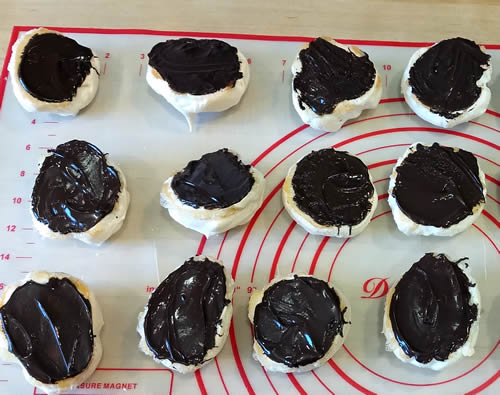
But anyway, back to those meringues! After my little pavlova cups had cooled, the final step was to melt some chocolate and paint the bottom of each cup.

Then after *that* dried, then you top each with a generous dollop of the pumpkin chiffon and ta da, you have a lovely little dessert.

These turned out surprisingly delicious, and I am glad I made them half-sized, because one little cup was plenty for a dessert. You get the light flavor of the pumpkin and spice, combined with the crispy/chewy texture of the meringue, and then just a little hit from the dark chocolate at the end. This is a recipe I would definitely make again.

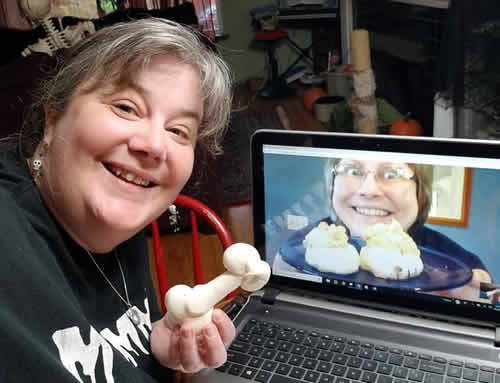
Here we are at the end of our #BakingSisters session, my sister with her bones, and me, looking weirdly crazed, with two little pavlova cups. Yum.


Baking Sisters – the unofficial version

A while ago I found this recipe, and I sent it to my sister in an email with the subject line that said ‘We need to make this.’

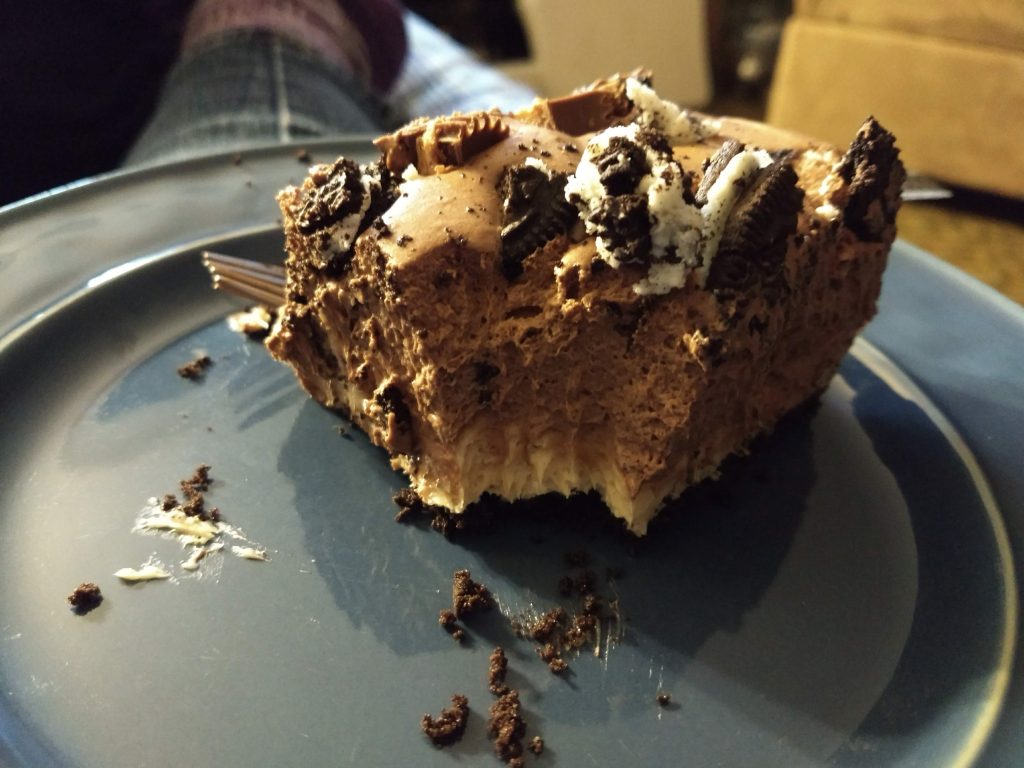
She agreed, and we did toy with the idea of trying to make it while I was up there for Operation Kitten Delivery. But then we took a closer look at the recipe and realized that it would take a lot of time, since there’s a lot of ‘make this piece and then let it sit for several hours’ steps, and also it was unseasonably warm, so instead we made a no-bake layered dessert consisting of crushed Oreos and two different layers of mousse – a cream cheese and peanut butter one and a chocolate one – and also mini peanut butter cups because why not.

(It was just as delicious as it looks)

But it was still at the back of my mind so I decided I was going to make it this weekend. And then she decided she’d make it too, so even if we weren’t doing an official #BakingSisters video chat, we’d still end up with roughly the same thing at the end.

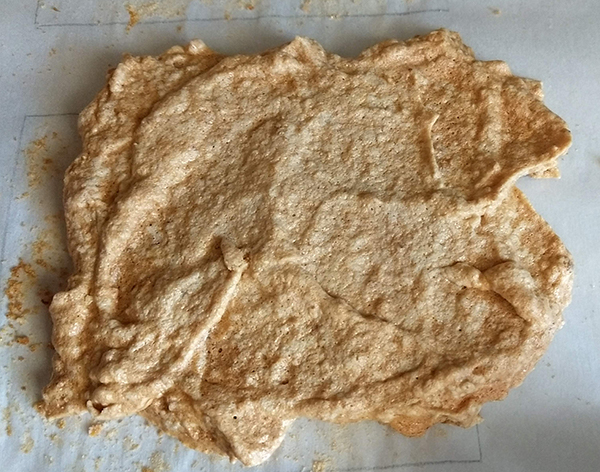
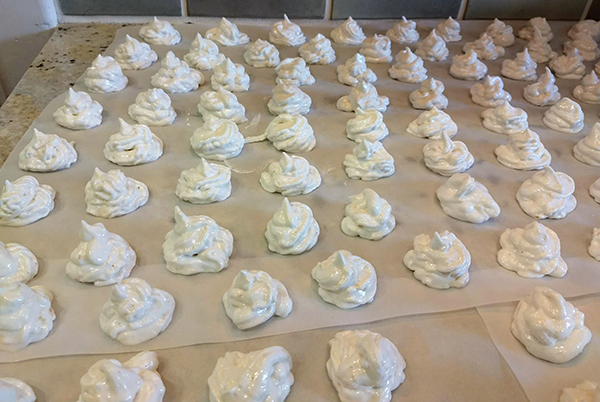
Overall, the recipe is actually not difficult – it’s just time consuming. First you make the layers of meringue, which includes peanuts, and you let them set for a while.

Then you make a lovely peanut butter mousse, and you stash that in the fridge because that also has to set for a couple hours.

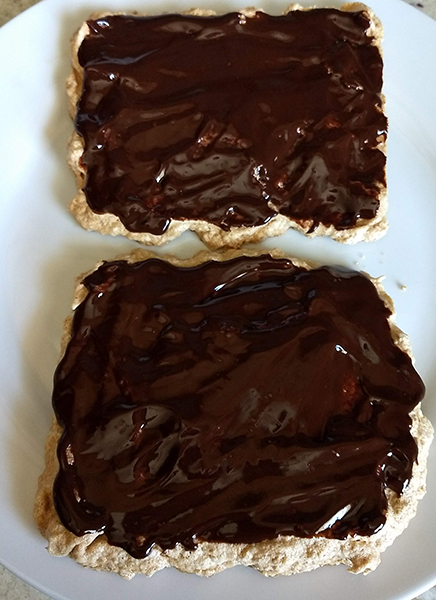
Next you make a chocolate glaze, and once that cools a bit, you glaze two of the layers of meringue and then you let them set for a while to allow the glaze to firm up.

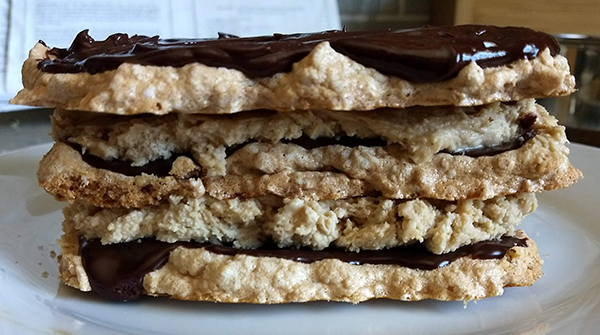
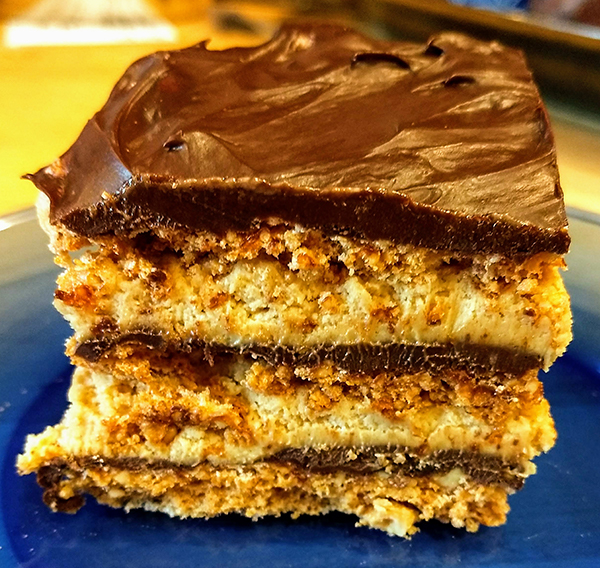
And then, finally, you stack everything – a layer of glazed meringue, half the mousse, another layer of glazed meringue, the rest of the mousse, and then the third layer of meringue, which then gets glazed as well.

The recipe actually calls for glazing the sides as well, but I was worried that might end up being too much chocolate, and it would overwhelm the peanut butter flavors. So I skipped that step (which is why my completed dessert looks a wee bit more…uh…rustic…than it should).

After the entire thing is assembled and allowed to, you guessed it, set for a while, then you can finally cut it into pieces and consume.

Verdict – this is absolutely delicious and something I would definitely make again, despite how long it takes to come together. The peanuts in the meringue layers give it a nice texture, and leaving off the glaze on the sides was a good decision, since the peanut butter mousse could then shine through. Yum!


Baking Sisters – The Russian edition

Why look, it’s time for another Baking Sisters adventure! This time, inspired by the fact that one of us stumbled across this Pirozhki recipe, we decided to do a vaguely Russian theme. By which I meant I Googled ‘Russian desserts’ and looked at what came up.

We both decided to make the pirozhki because those looked super tasty (and it’s nice to do something savory once in a while), and we both decided to make Zefir, which is a marshmallow sort of thing, although she made this version, while I decided to go the more traditional route and made these, which start with (no, really, I am not kidding) pureed apples. We both decided we had to make these Shokoladnaia Kartoshka (chocolate potatoes), because how could we pass *that* up? Also, I also made Ptichye Moloko (aka Birds Milk Cake) because it looked delicious, and she made some kind of candy that starts with actual mashed potato, for which I don’t have a recipe link but from reports on the other side of the webcam, you really, *really* don’t want to know anyway.

I kicked things off by making the dough for the pirozhki because that was going to take the longest in terms of rising, etc. My sister had already made her dough so she got started setting those up while I worked on the sponge layer for the Birds Milk Cake, since that would need to cool before I could add the mousse layer. And next we moved on to our respective zefir recipes.

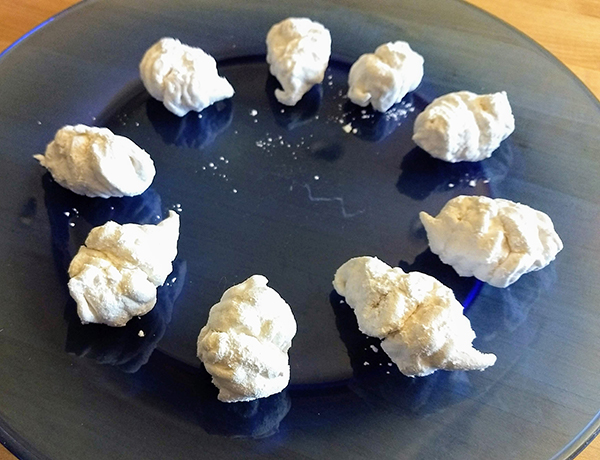
I only made half a recipe (which is good because it still made a LOT of them), so it started with just one egg white – an amount I discovered is too small for my Kitchen Aid to be able to recognize for beating. So I whisked it up by hand, and then dumped the foam into the bowl with the apple puree and kept on going, and shockingly, despite the fact that there was apple puree, it actually doubled in volume and turned into something light and airy, even after adding the agar agar and sugar syrup, which was itself a bit of a pain to put together.

I….clearly lack piping skills, but I did manage to pipe out some vaguely decoratively shaped lumps all over sheets of parchment paper.

My sister’s were much, much prettier, likely due to the fact that they had raspberry jello in them so they were a delicate pink color, and also she’s got actual training in pastry and knows how to pipe things that look nice, instead of like random blobs.

Next it was time to make the mousse for the Birds Milk Cake, since by then my sponge had cooled. The mousse is actually what made me want to try this recipe, since it’s made with sour cream and sweetened condensed milk. I poured that over the cake and popped it into the fridge to chill and moved on to mixing up the chocolate ‘potatoes’.

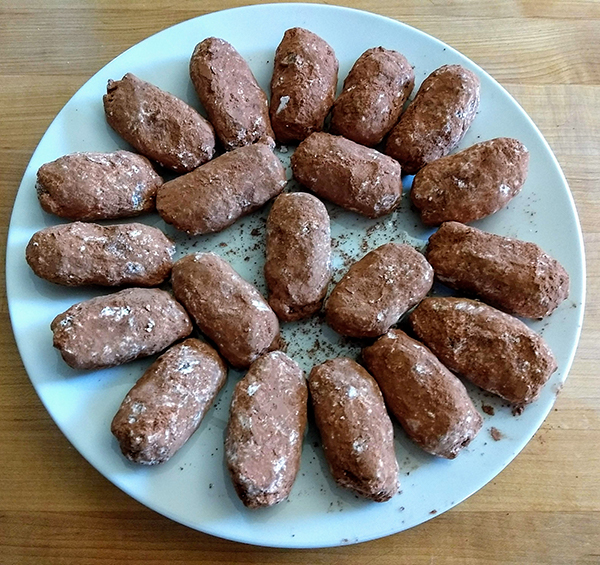
These were…interesting. They’re basically a mix of cocoa, sugar, crushed cookies and nuts, butter, and hey, look, yet more sweetened condensed milk. This all gets mixed together and then formed into roughly potato-shaped lumps, which are then rolled in powdered sugar and cocoa, so that they look vaguely like potatoes.

These are tasty, but very, very rich, and if I were to ever make them again (which I probably won’t), I’d make them at least half the size the recipe called for (or even smaller).

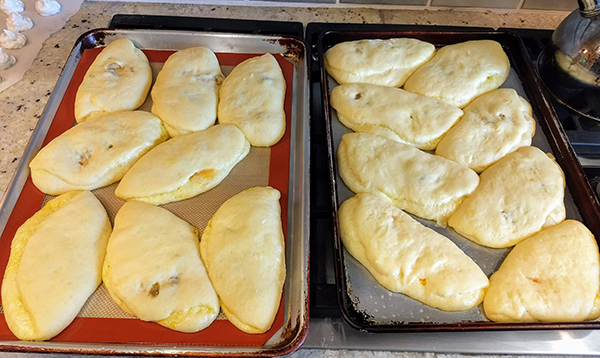
Once those were all chilling in the fridge, I made the ganache for the top of the Birds Milk Cake, and filled my pirozhki. Then I sat and chatted with my sister via webcam for a while, waiting for the pirozhki to rise, and didn’t even think to check on the dough, until it was too late. Clearly these are very, very overproofed.

Ah well, they were still tasty! The dough is soft, even after being baked. I had some turkey sausage that needed using up so I used that instead of ground beef for the filling, which added a nice flavor. Aside from the long rise times required, these were pretty simple to put together, so I might try making them again at some point, if only to prove to myself that I can.

As for the other two things, the zefir are…..interesting. The recipe I used said to let them sit for 24 hours, which seemed excessive, except that it turns out they really weren’t kidding. At first, they didn’t have much flavor except a light sweetneess, and they were super sticky, but after an entire day of sitting, the skin finally dried, and the apple flavor started to come through. The final step was to stick two together and then roll the assembled sweets in powdered sugar, which made them look even more ugly when one has very poor piping skills.

I ate a few – they’re sort of like a sweet, apple-flavored puff of air, which I didn’t mind, although and we brought them with us to a family gathering later in the weekend and reviews were a bit more mixed. But they were an awful lot of effort for a thing that I’m still not entirely sure I’d want to eat again. As for the version my sister made – they might have been prettier than mine, but they set a bit too firm, to the point where they were more like rubber, and were very unappealing.

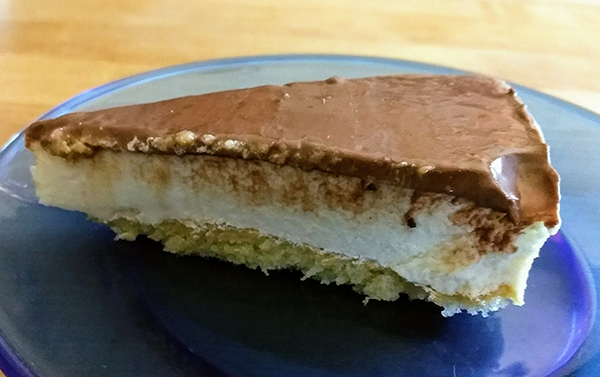
Of all four of the things I made for this month, the one we liked the most was the Birds Milk Cake. We had friends over later that day, so they got to be our guinea pigs for the tasting.

Look at all those pretty layers!

Aside from the one who isn’t a fan of sour cream, the rest of us all agreed it was pretty yummy, and this is definitely something I’d make again. Plus, one small slice goes a long way, so guess what we’ll be eating for dessert pretty much all the rest of this week.


Deep fried

This month, for our #BakingSisters event, my sister suggested we do a Doughnut Day. I was immediately on board, because for one thing, doughnuts (!!), and also I’ve actually never deep-fried anything before (with one minor exception), so I figured this would be fun. Over the past few weeks we’ve both been poking around, looking for interesting recipes to try (because why do boring regular donuts when there’s so many other options out there?). For the purposes of this challenge, any fried dough counts as a doughnut, and we each made three fried varieties and one baked one, although not all of them were the same.

To kick things off, Friday night we each put together the dough for beignets, since it needs to chill at least overnight. And then this morning, before we even got together online, I made Peanut Butter Doughnuts for breakfast, because I was getting hungry.
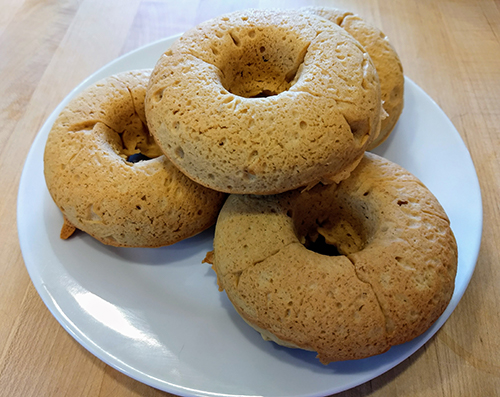
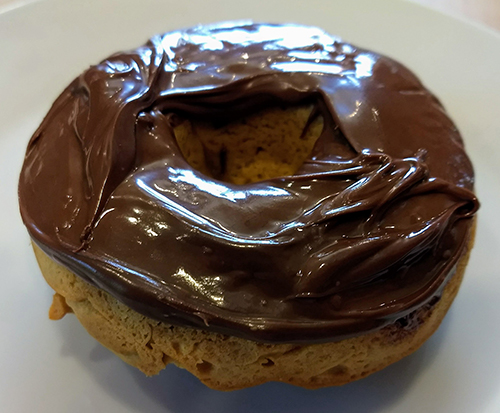
Technically I might have been cheating a bit, since I’ve made these doughnuts lots of times before – they’re one of the very few baked doughnut recipes I’ve tried that has the close texture and consistency of an real cake doughnut, instead of just being a muffin baked in a ring instead of a muffin tin, like the majority of the ‘baked doughnut’ recipes actually are. You can go through the hassle of making the chocolate glaze for these, if you really want, or you can just take the easy way out and smear them with Nutella prior to stuffing them into your face.
Once we connected via Google Hangouts, my sister immediately set to work making these Maple-Glazed Bacon Doughnuts, while I put together the dough for Koeksisters, which are a South African treat. I also got the oil started – first in my old Rival crockpot which technically could be used for frying (it even came with a fryer basket), but which never got up to temperature, so eventually I just dumped all the oil into a big pot on the oven and popped in my thermometer and hoped for the best.

Next, while my sister then put together the dough for Sopaipillas – a snack I remember my mom making back when we were kids – I rolled out my beignet dough and cut it into little 2-inch squares, and started dropping them into the oil to fry.

A quick digression. A couple years ago, for a Sisters Weekend, my sisters and I spent a couple days in an intensive baking class, where we made, among a plethora of other types of baked goods, beignets. They’re basically a brioche dough, fried and then rolled in vast quantities of powdered sugar. So technically I *have* deep-fried things before, except it was in someone else’s deep fryer gadget and i wasn’t responsible for tracking temperature of the oil and so on. Having never been to New Orleans, my memory of beignets is based solely on those, which were fluffy and soft and absolutely delightful.

These, however, weren’t quite the same. I’m not sure if it was because my oil was too hot (it was a royal pain trying to get it to stick to a consistent temperature), or if the dough was too dense, or some other factor, but while they were tasty enough, they didn’t in any way resemble the light, fluffy things we made in that class, lo those many years ago. Ah well.
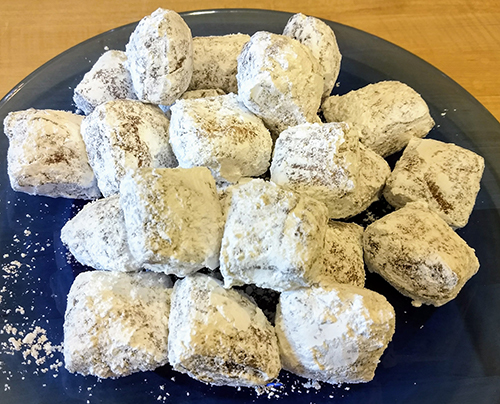
Powdered sugar can cover up all *kinds* of things, like the fact that some of them were probably a little overdone.

That done, it was time to return to the Koeksisters, now that the dough had rested enough. I rolled it out, then cut it into pieces and cut those into thin strips, which were then braided together.
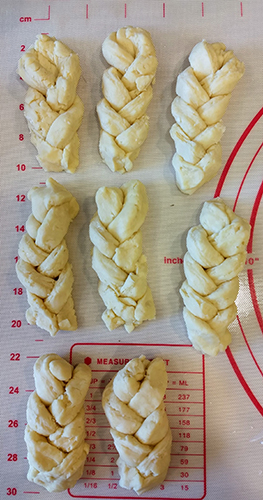
I took this picture after braiding them but before frying because I was worried they’d come apart in the oil.

Into the fryer they went. By this time I had gotten a better handle on maintaining the temperature, so these fried up a lovely golden brown, unlike with the beignets. Once out of the fryer, they got a quick few seconds to drain on some paper towels, before being immediately placed into a lightly spiced syrup. I actually made that earlier in the morning because it needed to cool completely prior to dropping in the hot doughnuts, and I was concerned it otherwise wouldn’t have enough time to chill.

A couple of the koeksisters fell apart in the syrup (all the better for taste-testing!), but most of them held together. I was pleased to see that braiding was still clearly visible after being fried.
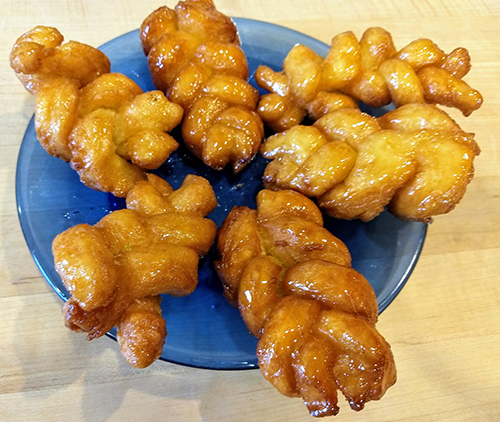
These are actually quite tasty. The spices didn’t come through – it’s possible I just didn’t use enough – but the dough is crunchy on the outside, yet soft in the middle, and the syrup adds a delightful sticky sweetness to the mix. I wondered about the fiddlyness of braiding the dough beforehand, except that I suspect doing this creates more nooks and crannies for the syrup to soak.

Finally, it was time to tackle the fourth recipe: Ponchiki. There are numerous variations out there for this doughnut, depending on if you want the Hungarian version (Turofank, which I made) or the Russian version (Ponchiki, which my sister made). In all the variations, the common denominator is the inclusion of cheese – either cottage cheese (which is what we used) or ricotta, or something similar. It’s just stirred directly into the batter when you make it, which sounds really odd, except that once it’s fried, you would seriously never guess it was there to begin with.

This was a much wetter dough than any of the others, more like fritter batter than something shaped. They rolled and bounced around a bit like angry puffer fish in the oil, and occasionally spewed out little blorps of dough here and there. And when you’re done you have a pile of strangely shaped little brown puffs.
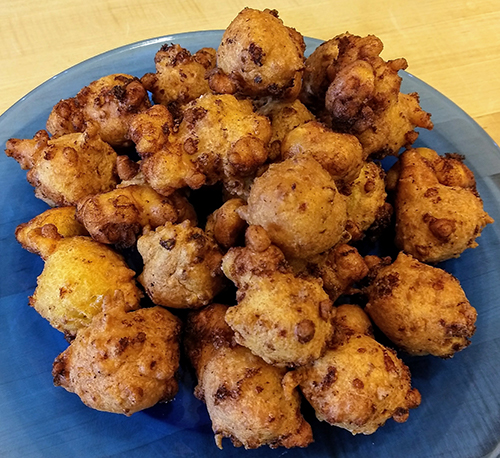
I know they don’t look like much in this picture, but, still warm from the fryer, they were delightfully light and airy, with just the faintest hint of sweetness. Alas, the version my sister made didn’t turn out as delicious for her; she said they were a bit stodgy and not at all interesting.

My sister and I with our various fried goodies.
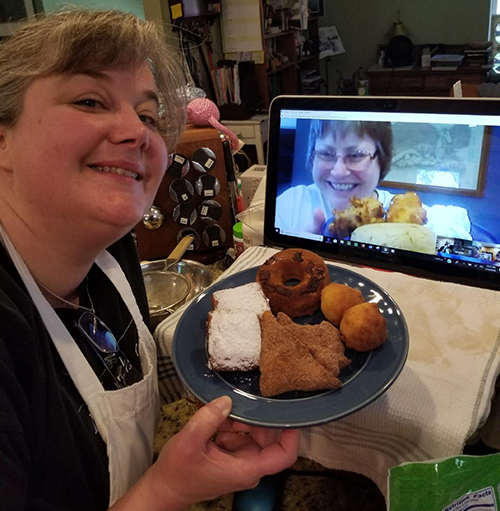
All in all, it was a fun morning, despite the mess of oil splatters all over my counter, and I got to try some new-to-me recipes. My favorite of the three new ones were the koeksisters and I’m pondering whether I could mimic the texture by baking the braids instead of frying them, prior to dipping them in the syrup. As for the beignets, I’ll leave those to New Orleans. It was fun to make them, but they were more trouble than they were worth, and, much like the Ponchiki, they were only good when fresh and warm, and they’re not the sort of thing that tastes good when reheated.
Just don’t ask me to pronounce it

As noted earlier, for April’s #BakingSisters project, my sister and I did liege waffles, but since the bulk of the work for those was done the day before, we decided to also make Kvaefjordkake.

This is a Norwegian cake (the internets tells me it’s the Official Cake of Norway, although as I am not Norweigian, I can’t attest to that being the truth or not), and it’s comprised of layers of cake, meringue, and pastry cream. It is also a shockingly simple cake to make, for all its various components.

First you make the pastry cream. Here is where I admit that while my sister went the full from-scratch direction, I took advantage of the ‘cheater’ method espoused by King Arthur Flour (that link goes to their version of this cake) and made mine from a box of vanilla pudding and some heavy cream and the insides of a vanilla bean.

Once the pastry cream is chilling in the fridge, then you make the cake, which is nothing more than a very thin vanilla sponge. My sister made the King Arthur Flour version of this cake, so she spread hers into two round tins, while I dutifully followed the instructions in the version I was using, and spread mine out on a baking tray lined with parchment paper.

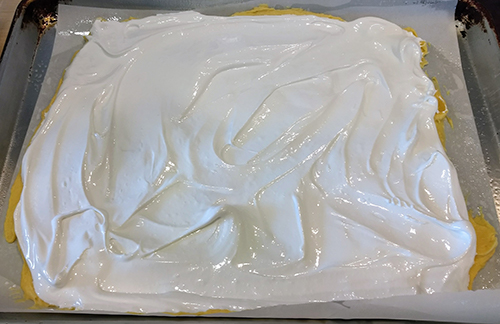
Then you make meringue, which is really nothing more than egg whites whipped until stiff, with sugar stirred in, and you spread that on top of the cake batter.

It looks a bit like it’s been topped with marshmallow fluff.

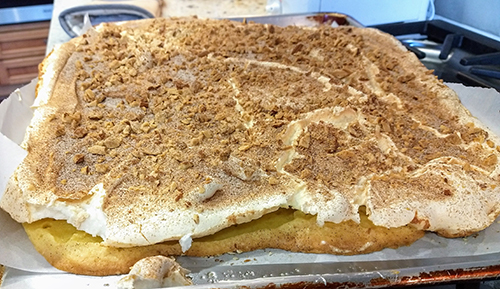
Then that gets sprinkled with cinnamon sugar and chopped almonds (or in the case of my sister, who is unfortunately allergic to nuts, feuilletine), and popped into the oven to bake until the meringue is dry and crispy on the outside.

While that cooled, we took a short kitten break (or rather, I took the laptop into the foster room and held up both kitten and momma to the camera so my sister could see them). And then finally it was time to assemble.

For the sheet pan version, that meant just cutting the thing in half. For the round version, that required a little more effort in order to extricate the cakes from the tins. Luckily the fact that the meringue is topped with cinnamon sugar and almonds means it already looks a bit rustic, so if the meringue gets a little cracked or smooshed during the process, that’s okay.

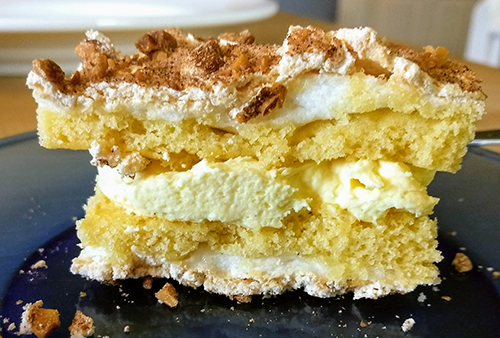
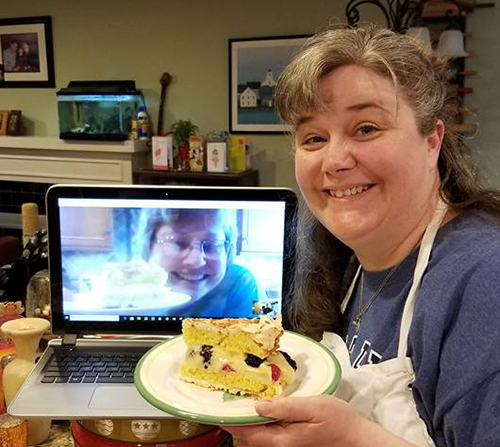
For the final step, you spread one half with the pastry cream, and then top that with the second half. My sister added berries to hers, but as I do not like berries, I kept mine plain. I also followed a suggestion I found in the comments and put the bottom layer meringue-side down, so that the pastry cream was sandwiched between the cake layers, in order to help keep the meringue crisp.

Verdict: This thing is incredibly delicious (and incredibly rich), and I can easily see why it’s earned the nickname of World’s Best Cake. The flavors of each layer are very delicate but they all work well together. The meringue provides a crisp, yet chewy texture and the almonds provide a much-needed crunch. Many yummy noises were made on both sides of the camera, from all four taste testers involved (both husbands eagerly took part in this).

My sister’s looks so pretty with the berries!

I did not actually assemble the whole thing on the day of baking, because I really didn’t want to have that much cake sitting around, tempting us. So instead I only layered two small pieces for the initial tasting, and then carefully wrapped up the remaining pieces of cake for later. The rest was fully assembled and taken to a meeting a few days later, where it was devoured with much enthusiasm. I think it’s safe to say I’ll definitely be making this one again.


Fit for kings

Many, many years ago, when my older sister and her husband were first married, my brother-in-law was accepted for a year’s study at the Von Karman Institute of Fluid Dynamics in Belgium. This was a huge opportunity for him, so since they were still young and unencumbered, they packed up all their stuff and stashed it in a storage shed in my parents’ back yard, found a friend to live in their apartment and take care of the cats, and headed off to Belgium.

My parents and my younger sister and I flew out to visit them, because how could we not? It was a wonderful trip – wandering around all these amazing, historic sites, wandering through buildings that were older than my own country and trying to soak in as much as we could in just a few days. The trip spoiled me completely for chocolate, because there is no comparing the chocolate over there with the waxy, too-sweet stuff I could get back home (although in the decades since, that has thankfully been slowly changing), and for bread (there is no comparing the tasteless packaged loaves sold in major grocery stores with what you can get from the tiny bakeries that were everywhere). And of course, there were the waffles.

When you think waffles in the US, you think of breakfast food. But in Belgium, they were snack food, and there were little street cart vendors everywhere, selling sticky-sweet waffles wrapped in grease paper. They were at once crunchy and chewy and absolutely divine.

On returning to the US, we started noticing some restaurants advertising that they offered Belgian waffles. Alas, much to our disappointment, these were not what we had had in Belgium. These, instead, were soft, floppy things with extra-deep pockets, but otherwise made of the same dough as any other ordinary breakfast waffle. My understanding is that ‘Belgian’ is the brand name of the original waffle iron with those deep pockets, and had nothing whatsoever to do with the country.

Decades later, the internets tell me that we were not the only ones who were let down by waffles of a similar name. What we didn’t know at the time, but since have learned, is that the things we had in Belgium are actually known as liege waffles. Not that it would have helped us much, since liege waffles are, alas, not a ‘thing’ in the US, but at least knowing the name pointed us in the direction of recipes to try to make them ourselves for this month’s #BakingSisters project.

There are a lot of recipes out there, but we used this one. This is a yeasted dough, and the recipe linked above had all sorts of extra steps, which meant that in order to actually cook waffles on our #BakingSisters day, we had to do a whole lot of prep work the day before.

First, you mix up a sponge of flour and water and yeast and let that sit for an hour, and then you mix in all the rest of the ingredients, including a whopping 11 tablespoons (no I am not kdding) of butter. That creates a lovely soft and silky dough that sits for four hours to rise, and then then goes into the fridge to rest overnight.

The next morning, the dough comes out of the fridge, and then – here’s where it got messy – you take this very soft and sticky dough and you knead in pearl sugar. In some recipes you could probably swap sugar types with ease, but here, you really have to have the pearl sugar, because that’s what gives liege waffles their signature texture and flavor.

After the pearl sugar is all kneaded in, next you divide the batter into six pieces and let it sit for another 90 minutes.

And then, finally, you are ready to cook them.

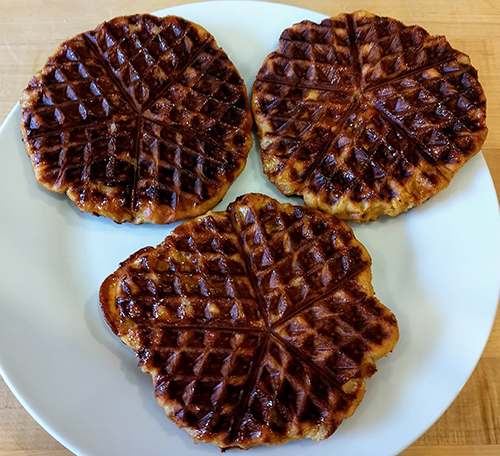
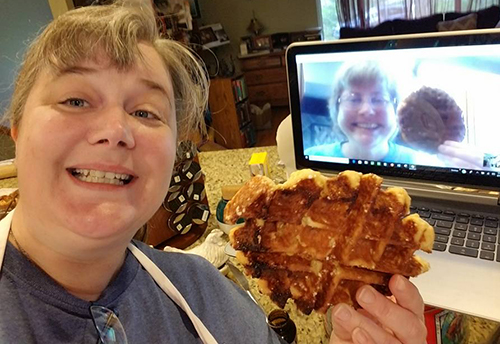
It took a couple waffles to get the hang of how best to cook them. My sister did hers in a Belgian iron (the kind with the deep pockets) but I just used a regular waffle iron. The first one or two were a bit misshapen and it was hard to tell quite how long to cook them (the recipe says 2 to 4 minutes). I started using the bottom of a pan to help press the top of the waffle iron down on the last few, in order to spread the dough out more uniformly, and that seemed to help.

So were they everything we remembered, lo those many years ago?

Yes, I think so. A couple of mine got a little overdone, but they were still a good representation of what we remembered. The pearl sugar melts and creates these little pockets of caramel goodness on the outside of the waffle. It’s not something I’m likely to make again, or at least not for a very long time (since it’s time consuming and messy) but it was fun to take the first bite, and to reminisce about a trip, so many years ago.


Knot worth it

What’s that, you say, you’ve been missing all my rambles on baking since the end of this year’s Thingadailies? Don’t worry, I’ve got you covered. Yes, that’s right, it’s time for another #BakingSisters bake!

This weekend my parents were up in Seattle in order to visit with my sister and also see my niece play a mermaid in her last high school play (because somehow she is now a senior, even though I can’t figure out how that happened because the rest of us certainly haven’t aged that much since she was born, right? Oh, wait….

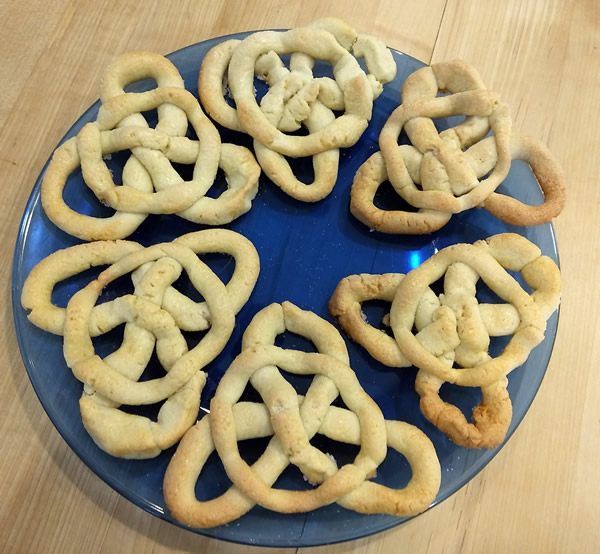
Anyway, because they were visiting and because things were going to be busy with the play, this month we decided to do cookies – specifically Tudor Jumbles. These were a recent Technical Challenge recipe on the Great British Bake Off, should the name sound familiar.

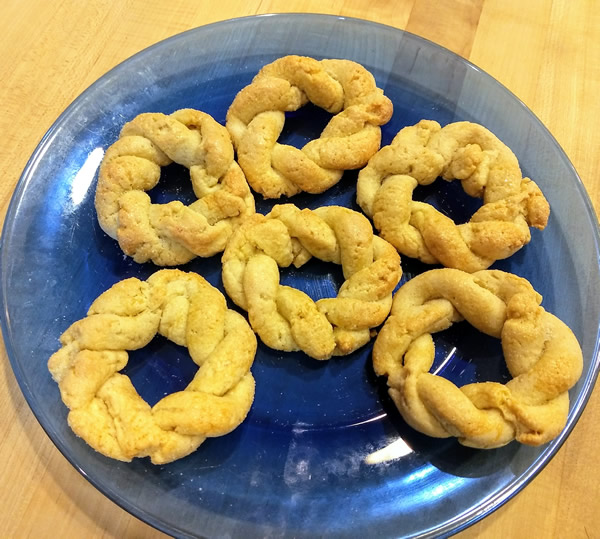
The dough itself is pretty basic – flour, sugar, butter, some flavorings, and an egg. Where it gets complicated is with the shaping, because you can’t just plop a lump of dough onto a sheet pan and call it done. No, these had to be carefully knotted into complicated shapes, then brushed with egg wash and sprinkled with sugar before baking.

My sister (with my mom joining in) made the dough in that recipe above. I, however, do not like either caraway seeds or anise (licorice) flavoring, so I went a bit off script. I made two half-batches of dough – one with ginger, and one with some almond flour (primarily because I had some that needed using up) and almond extract.

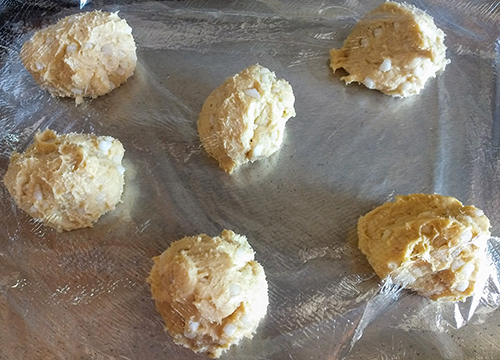
The first shape is a circular knot. The dough I flavored with ginger was really, really dry and it was actually pretty hard to ‘knot’ the rope of dough without it cracking into a million little pieces.

The second shape is a triangle ‘knot’. I know that technically I should have figure out a way to do it all with one single continuous rope of dough, but this one was a nightmare to shape to begin with (the almond dough was a lot softer than the ginger dough, to the point where I actually ended up kneading in a whole lot more flour prior to shaping, just so it would be firm enough to work with), and any attempts to weave the circle through the triangle points just ended up with broken dough and a lot of under-the-breath swearing.

Shaping these cookies was not a quick process, and it seems rather anticlimactic that for all that work, you only end up with 12 cookies in total. They’re also *big* cookies – each one is a couple inches across.

Verdict: Eh. The flavor’s not bad, but it certainly wasn’t worth all the effort of making the knots for just an okay cookie. My sister did comment that it might be fun to try the knots again with a different type of dough – perhaps a gingerbread – that had a little more pliability, and a lot more flavor. So we’ll see – maybe come Christmas time I’ll feel the urge to wrap dough into stupid little knots again. Or maybe….not.


Light as air

Do you know what today is? It is February 28th! That means it’s the last day of Thingadailies.

We started the month with chocolate, in the form of baked Alaska, so I suppose it’s only fitting that we end the month with chocolate as well. Conveniently, today is National Chocolate Souffle Day. I hope you all pulled out the whisks and celebrated appropriately.

Souffle is one of those fussy sort of recipes that I’ve tried in the past (in both sweet and savory forms) with varying levels of success. If you’re not careful, you end up with something that tastes overly eggy, or lumpy with bits of cooked egg. It’s also not a food that I get excited about in general, so it’s not like I’ve spent much time trying to perfect it. Nevertheless, I figured I’d give it a shot. Considering that chocolate souffles were a Technical Challenge on one season of Great British Bake-off, I went into this with a bit of trepidation.

I used this recipe. It calls for two six-ounce souffle dishes but we’re not that fancy around here, so I used two tiny little Pyrex bowls that are 5 ounces each, and hoped for the best.

It’s a recipe with several fiddly steps – melting chocolate and then stirring in butter, whipping egg whites, and then carefully combining the two mixtures together in such a way that you minimize the loss of any volume you just whipped into the egg whites. The dishes are buttered and then sugared, and then filled to the brim, and then they get stuck into the oven on the lowest rack for fifteen minutes.

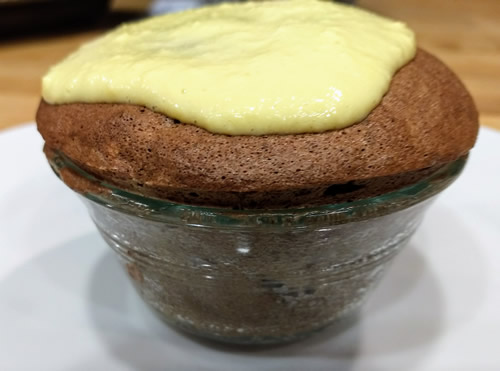
We kept careful watch on the oven as the souffles cooked and both of us gave a little cheer when it started to puff up over the sides of the bowl. When the timer went off I pulled them out, and then hurriedly poured the creme anglais over the top so I could take a picture.

It’s not very impressive-looking, I know, but it turned out really, really well. Shockingly, I managed to make two perfect little souffles. The inside was smooth and literally just melted in the mouth, with no little bits of egg, or graininess from the chocolate. I even managed to do justice to the creme anglaise, which was smooth and sweet and a nice accompaniment to the chocolate.

Definitely nice to end this year’s Thingadailies on a high note.


From the briny deep

There aren’t any food-related Days to celebrate today, although today *is* Tell a Fairy Tale day, so maybe gather around with your nearest and dearest and read them something from the Grimm brothers. Meanwhile, I still have a can of clams to use up, so today we’re doing what I intended to do yesterday, which is to tackle Clam Chowder Day.

Apparently there are different versions of clam chowder out there – red and white – but the only kind I’ve ever had is the white kind, so that’s what I made. I used this recipe, because it seemed pretty straightforward.

It’s pretty simple to throw together. You cook bacon, onion, and celery in a little bit of butter until the vegetables are soft, and then you stir in all the rest of the ingredients and simmer until the potatoes are tender.

Because it’s Monday, which means I have rehearsal in the evening, I actually put this together this morning, and then reheated it for dinner. I think that was a wise, move, as the potatoes helped to thicken up the soup as it sat. Also I added a dash of half and half, because I felt like it needed a bit of extra ‘oomph’.

Could I make this bowl of chowder look any *less* exciting?

We ate them with some faintly-tuna-flavored ‘crackers‘ sprinkled on top (because the cats seriously aren’t interested, so we might as well use them up somehow. Eh, they’re not oyster crackers, but they worked the same, so it was fine.

Making a thing a day for Thingadailies.


Phoning it in

It’s been a very long couple days, what with being sick, and also having two performances to get through. This whatever-it-is hit me on Wednesday, and the worst was, thankfully, Thursday, but still, I sang the concerts through the power of cough drops and magic (although at least one bonus of being sick when one is already a low Alto, is that one can then sing the low notes with *way* more power, so….yay?), and pretty much tried to rest and recuperate at home when I wasn’t singing. Ah, fun times.

Today, however, was the last day of Stitches West, and I had a couple really good reasons for wanting to go this year. When I woke up this morning I felt like the worst was over (except for some residual hoarseness of the voice), so I bundled up all my stuff for the day and drove down to Santa Clara and spent the whole day there, hanging out with lots of friendly knitters and surrounded by so much yarn. I kept my willpower firmly in check and only bought one skein of yarn (in my defense, it’s a gorgeous shade of purple, and was only $16.50 for 1000 yards of a bamboo-cotton blend laceweight. I am not made of stone, people!).

I hung out at the Lacey Knitters Guild booth and got to chat with a number of fellow guild members, some of whom I only get to see once a year. I got to finally meet in person the awesome lady at Knit Picks with whom I’ve been working for the past six years, and I also got to finally meet in person someone I’ve known via an online community for probably close to 15 years.

I had grand plans for dinner tonight, as it’s Clam Chowder Day. But by the time I got home, my head was killing me, and I couldn’t handle the thought of trying to put *anything* together. So instead I dosed myself with ibuprofin and Richard ordered pizza, and later on, after I’d started to feel a bit more human, I made Chocolate Covered Peanuts. Because today is also Chocolate Covered Peanut Day.

There is no specific recipe for this. Basically I took the remains of a bag of chocolate chips and the remains of a bag of butterscotch chips and dumped them into a bowl and heated that in the microwave until they were all melted. And then I dumped in the remains of a jar of peanuts and stirred those around until they were all well-coated, and I poured it out onto a sheet of waxed paper and stuck that in the fridge to chill. After about an hour or so – I wasn’t really timing it – they were firm enough, so I broke the whole mess apart into chunks, and voila, chocolate-covered peanuts.
Ta da. Or something. I dunno. They’re chocolate covered peanuts. What more is there to say?

Making a thing a day for Thingadailies.


top